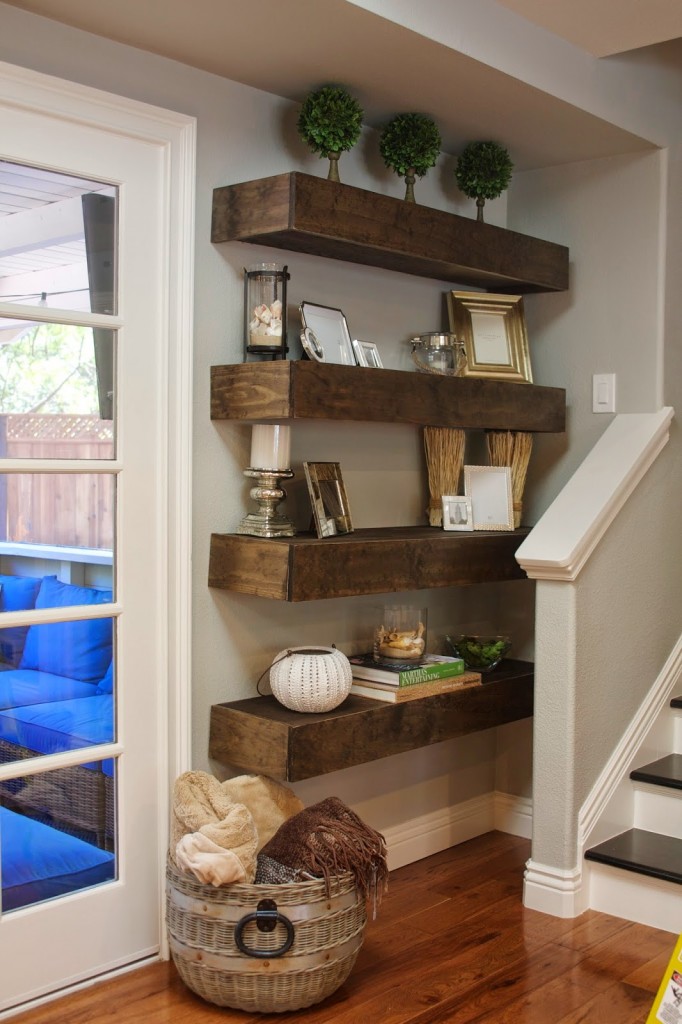
Alright, let's be real. You've got a tiny space, and you're tired of clutter. It's like trying to fit a whole wardrobe into a shoebox, right? But don't despair! We're going to tackle this problem head-on with a DIY project that's easier than it looks - a wall-mounted shelf that's perfect for small spaces.
Think about it: you're not just adding storage, you're adding style. It's like magic! Suddenly, those books and knick-knacks have a designated spot, and your room feels more spacious and organized. Who needs a fancy store-bought shelf when you can build your own masterpiece, right?
Now, before we dive into the nitty-gritty details, let's talk about what makes a good wall-mounted shelf for small spaces:
Keep it simple: Don't go overboard with fancy designs. We're aiming for functional, yet stylish. Think clean lines and a minimalist approach.
Think vertical: Maximize your space by building upwards! A tall, narrow shelf takes up less floor space and is perfect for displaying books, plants, or your favorite decorative items.
Embrace the light: Choose a light-colored wood that complements your existing decor and doesn't visually shrink the space. White, natural wood tones, or a light gray are all great options.
Don't forget the hardware: The right brackets can make all the difference. Choose sturdy, yet sleek brackets that blend seamlessly with your shelf design.
Now, let's get our hands dirty (literally)! Here's what you'll need for your DIY project:
Materials:
Wood boards (we'll talk about size and quantity in a bit)
Wood stain or paint (optional)
Wood glue
Sandpaper
Wood filler (if needed)
Screws
Wall-mounting brackets (choose based on the weight you'll be storing)
Drill with drill bits
Level
Tape measure
Pencil
Safety glasses
Dust mask
Step 1: Plan Your Shelf
First things first, measure the space where you want to hang your shelf. Consider the width and height you need. If you're going for a narrow shelf, a board width of 8-10 inches is a good starting point. For the height, consider how many shelves you want and the space between them. Think about what you plan to store on the shelf and ensure it's deep enough.
Step 2: Cut Your Boards
Head to your local hardware store and get the wood you need! I usually opt for pine or plywood. They're affordable and easy to work with. You'll need a saw to cut the boards to the right size. If you don't have a saw, most hardware stores will cut the boards for you.
Step 3: Sanding Time
Once you have all your pieces cut, it's time for sanding. This step makes your shelf smooth and ready for staining or painting. Start with a coarse sandpaper to get rid of any rough edges, then switch to a finer grit for a smooth finish.
Step 4: Staining or Painting
Now for the fun part! If you want a natural wood look, stain your shelf with your chosen color. Let it dry completely before moving on. If you prefer a painted finish, apply two coats of paint for a more durable surface.
Step 5: Adding the Brackets
This is a crucial step! The brackets need to be strong enough to support the weight of your shelf and everything you plan to put on it. Measure and mark the spots for your brackets on the back of the shelf. Use your drill to pre-drill holes and then screw the brackets in place.
Step 6: Time to Assemble
Now you'll assemble your shelf! If you're building a multi-shelf unit, carefully position the boards with the brackets facing outwards. Use wood glue to secure the boards together and let it dry completely before adding anything to the shelf.
Step 7: Install the Shelf
Finally, it's time to hang your shelf! Using a level, mark the spot on the wall where you want to hang your shelf. Use your drill to pre-drill holes and then screw the brackets into the wall. Remember to use appropriate anchors if needed.
Step 8: Admire Your Work!
Congratulations! You've successfully built a DIY wall-mounted shelf. Go ahead, decorate it with your favorite things and enjoy the sense of accomplishment!
Beyond the Basics:
Shelf Styling: Don't forget the fun part â€" decorating! Play around with different arrangements, colors, and textures to personalize your shelf.
Floating Shelf Illusion: For a modern look, use hidden brackets that make the shelf appear to be floating.
Creative Shelving Solutions: Get creative! You can use reclaimed wood, repurposed materials, or even build a shelf with a built-in light fixture.
Safety First:
Always wear safety glasses and a dust mask when working with wood
Use a level to ensure your shelf is installed straight
Make sure your brackets are securely attached to the wall
Don't overload your shelf with heavy objects
Remember, the beauty of a DIY project is that you can tailor it to your needs and preferences. So go ahead and experiment! You might surprise yourself with what you can create. And who knows, you might even discover a hidden talent for woodworking!


0 comments:
Post a Comment
Note: Only a member of this blog may post a comment.