Tuesday, November 12, 2024

Wooden clock building for beginners: tips and techniques

Posted by Alton with No comments

Wooden Clock Building for Beginners: Tips and Techniques

Hey there, clock enthusiasts! Want to build a beautiful, functional wooden clock that you can be proud of? You've come to the right place! This guide is tailored specifically for beginners, so don't worry if you've never touched a saw before. We'll cover everything from choosing the right materials to assembling your masterpiece, and along the way, we'll sprinkle in some tips and tricks to make the process smooth and enjoyable. So, grab your tools, put on your thinking cap, and let's get started on this exciting journey!

Getting Started: Choosing the Right Tools and Materials

Before diving into the actual construction, we need to equip ourselves with the right tools and materials. Think of it like a chef gathering their ingredients â€" the better the tools, the better the final product! Here's a list of essentials:

Tools

  • Saw: A handsaw or a jigsaw will come in handy for cutting your wood. Choose a saw that's comfortable for you to hold and use.
  • Sandpaper: Different grits of sandpaper are crucial for achieving a smooth finish. Start with coarser grits to remove imperfections and finish with finer grits for a polished look.
  • Drill: A drill with various drill bits is essential for creating holes for screws, clock hands, and other parts.
  • Screwdrivers: You'll need both Phillips head and flathead screwdrivers for attaching parts securely.
  • Clamps: Clamps will help keep your pieces securely in place while you work, especially during glue-up stages.
  • Measuring tape: Accuracy is key, so ensure you have a reliable measuring tape to make precise cuts and mark your wood.
  • Pencil: Use a pencil to mark your wood accurately before cutting or drilling.
  • Wood glue: A good wood glue is essential for strong, long-lasting joints.

Materials

Now, onto the heart of your clock â€" the materials! Here are the key components:

  • Wood: You have a wide range of choices here! Some popular options for beginners include:
    • Pine: Easy to work with, relatively inexpensive, and readily available.
    • Maple: Offers a beautiful, slightly harder wood with a beautiful grain pattern.
    • Cherry: Known for its rich color and durability, though it might be slightly more expensive than other options.
  • Clock Movement: This is the brains of your operation! Look for a clock movement that fits your design and desired size. There are different types available, including quartz movements (battery powered) and mechanical movements (winding required).
  • Clock Hands: These are the expressive elements of your clock! You can choose from a wide variety of styles, materials (metal, wood, acrylic), and sizes.
  • Finishes: Consider how you want your clock to look! Options include stain, paint, varnish, or a combination of these. Pick colors and finishes that complement your wood choice and overall design.

Designing Your Wooden Clock: From Inspiration to Blueprint

Before jumping into construction, let's give our clock a personality! Think about the style you're going for, the size you want, and any special features you'd like to include. There are endless possibilities! Here are some ideas to get your creative juices flowing:

  • Shape: Think beyond traditional round clocks! Try a square, rectangular, hexagonal, or even a whimsical shape inspired by nature or your own design.
  • Size: The size of your clock will influence the materials you choose and the complexity of the design. Start with a smaller, simpler design if you're a beginner.
  • Features: Do you want a shelf or a small drawer incorporated into your design? Maybe you want to add decorative elements like carvings, inlays, or painted details.

Once you have a clear vision, sketch out your ideas on paper. This will help you visualize the final product and make adjustments along the way. If you're comfortable with digital tools, consider using design software like SketchUp or Fusion 360 to create a detailed 3D model. This will give you an accurate representation of your design and help you plan your cuts and assembly steps.

Building Your Wooden Clock: From Cuts to Assembly

Now, the exciting part â€" building your clock! Here's a step-by-step guide, remembering to use your design as a roadmap:

Cutting the Wood

  • Mark Carefully: Measure twice, cut once! Use a pencil to mark your wood precisely before making any cuts. A sharp pencil will leave clear markings, ensuring accuracy.
  • Cut with Confidence: Choose a cutting method that you're comfortable with. For straight cuts, a handsaw or jigsaw is ideal. If your design involves intricate curves, a jigsaw is a good option.
  • Sand Smooth: Once you've cut all your pieces, give them a good sanding. Start with a coarser grit sandpaper to remove any rough edges and imperfections. Then, use progressively finer grits to achieve a smooth finish.

Assembling the Clock

  • Join the Pieces: There are several ways to join wooden pieces together. For a simple clock, you might use wood glue and screws or wood glue and dowels. If you're feeling ambitious, try techniques like mortise and tenon joints or dovetail joints.
  • Clamp Securely: Use clamps to hold your pieces firmly in place while the glue dries. This ensures a strong and even bond.
  • Mount the Clock Movement: Once your clock case is assembled, it's time to mount the clock movement. Carefully drill holes for the movement screws and secure it in place. Make sure the movement is level and centered.
  • Attach the Clock Hands: The final touch! Align the clock hands to the movement's spindles and gently tighten them in place. Make sure the hands are correctly positioned (hour, minute, and second) to ensure proper timekeeping.

Finishing Touches: Adding the Perfect Finish

Your wooden clock is almost complete! Now it's time to add those finishing touches that will make it truly unique. Consider these options:

  • Stain: A stain will enhance the natural beauty of the wood, adding depth and richness to the grain. Choose a stain color that complements your wood type and overall design.
  • Paint: If you want a bolder look, you can paint your clock any color you like. Consider using a primer first to ensure even coverage. A distressed or layered paint technique can add a vintage touch.
  • Varnish: A varnish will protect your clock from scratches, moisture, and spills. Choose a clear varnish for a natural look or a tinted varnish to add a hint of color.
  • Additional Details: Get creative! You can add decorative details like carvings, inlays, or painted accents to personalize your clock. A unique design can make it a true conversation starter.

Tips and Tricks from Experienced Clock Builders

Here are some valuable tips and tricks from experienced clock builders to help you avoid common mistakes and create a flawless masterpiece:

  • Plan Ahead: Take the time to design your clock thoroughly. Consider the size, shape, and features you want. Sketch out your ideas and create a detailed blueprint before you start cutting wood.
  • Measure Twice, Cut Once: This timeless advice is crucial in woodworking. Double-check your measurements to ensure accurate cuts and a well-fitted clock case.
  • Use the Right Tools: Invest in quality tools that are designed for the job. A sharp saw, a good drill, and a quality measuring tape will make the process easier and yield more accurate results.
  • Sand Smoothly: Take the time to sand your wood pieces thoroughly. A smooth finish will enhance the look of your clock and prevent splintering.
  • Practice Makes Perfect: If you're new to woodworking, don't be afraid to experiment. Start with simple projects and gradually build up your skills. You can always find plenty of online resources and tutorials to help you along the way.
  • Enjoy the Process: Building a wooden clock is a rewarding experience. Take your time, be patient, and have fun!

Conclusion: Congratulations, You're a Clock Maker!

There you have it! You've successfully navigated the world of wooden clock building for beginners. Remember, the journey is just as important as the destination. Embrace the challenges, celebrate your successes, and have pride in the beautiful, functional timepiece you've created. Now, go forth and tell time in style!

Complete guide to making a diy magic box from wood

Posted by Alton with No comments
Complete guide to making a diy magic box from wood

Building a Magic Box: Your DIY Guide to Illusions and Wonders

Hey there, aspiring illusionists and DIY enthusiasts! Ever wanted to create a magic box that's as mysterious as it is impressive? Well, you've come to the right place. In this guide, we'll walk you through the process of building your very own magic box from scratch, from choosing the right materials to mastering the secrets of its illusions. Get ready to turn your woodworking skills into mind-bending magic!

Step 1: Gathering Your Magical Materials

Before you start sawing and hammering, let's make sure you have everything you need. Here's your magical supply list:

  • Wood: Choose a sturdy wood like plywood or MDF for the box’s frame. Opt for a thickness that provides good stability.
  • Hardware: This includes hinges for the box lid, screws, nails, and any other fasteners you’ll need.
  • Saw: A table saw or circular saw is great for precise cuts. A handsaw will work if you prefer a more traditional approach.
  • Measuring Tape and Pencil: Accuracy is key! Make sure to measure twice and cut once.
  • Drill: You’ll need a drill for pilot holes and attaching hardware.
  • Sandpaper: Sanding down the edges of your wood will give your box a smooth finish.
  • Paint or Stain: This is for giving your magic box a custom look. Get creative!
  • Secret Mechanism: This is the heart of your magic box. More on this later!
  • Glue: Wood glue is essential for secure joints.

Step 2: Designing Your Illusion

The fun really begins here! You’ve got a blank canvas of wood, and it’s time to give it a personality. What kind of illusions do you want your magic box to perform?

Some Classic Magic Box Tricks:

  • Vanishing Object: The classic disappearing act. The box can be designed to make an object seemingly disappear into thin air.
  • The Multiplying Object: Watch in amazement as one object magically transforms into multiple objects.
  • The Traveling Object: An object mysteriously travels from one box to another.
  • The Changing Colors: A box that can make an object change its color.

Let your imagination run wild! You can even come up with your own unique magic box trick.

Step 3: Building the Box

Let’s get our hands dirty (and a little sawdust on our clothes, too!). Now's the time to bring your design to life:

  • Cut the Wood: Based on your design, cut your wood pieces to the appropriate dimensions using your chosen saw.
  • Assemble the Box: Connect the sides, bottom, and top of your box using glue and screws. Make sure the joints are tight and well-aligned.
  • Attach the Lid: Attach the lid to the box using hinges, allowing it to open and close smoothly.
  • Sand and Finish: Sand down any rough edges and give your magic box a beautiful finish with paint or stain.

Step 4: The Secret Mechanism

Now comes the really magical part! This is where the illusion takes shape. The secret mechanism is what will make your magic box perform its wonders. Here are a few common methods:

Vanishing Object:

  • Secret Compartment: A hidden compartment within the box can be used to conceal the object, allowing it to appear to vanish. This compartment can be accessed by a hidden lever or trapdoor.
  • Sliding Panel: A cleverly hidden panel that slides to the side, allowing the object to drop out of sight.

Multiplying Object:

  • Duplicate Objects: Have a second identical object hidden within the box, which is revealed when the first object is removed.
  • Hidden Compartments: The box can contain multiple compartments, each revealing a new object.

Traveling Object:

  • Secret Tunnel: A tunnel concealed within the box can transport the object to a separate hidden box.
  • Hidden Magnets: Magnets can be used to move the object to another box.

Step 5: Practicing Your Magic

You've built your magic box, and now it's time to practice! Once you've got the secret mechanism down pat, run through your routine to ensure a smooth performance. Remember, a good magician always practices and refines their craft.

Step 6: Unveiling the Magic

With your magic box complete and your skills honed, it's time to share your wonders! Gather your audience, perform your illusions with confidence, and let your magic box amaze them. Your DIY magic box will become a conversation starter and a testament to your creativity and craftsmanship.

A Few Final Tips:

  • Safety First: Use caution when working with power tools. Always wear safety glasses and follow proper safety guidelines.
  • Be Creative: Don't be afraid to experiment and put your own spin on the designs. Magic boxes are a canvas for your creativity!
  • Practice Makes Perfect: The more you practice, the smoother your illusions will become.
  • Enjoy the Process: Building a magic box is a fun and rewarding project. Enjoy the journey of creating something unique and magical!

Monday, November 11, 2024

Diy guide to building a farmhouse-style wooden desk

Posted by Alton with No comments
Diy guide to building a farmhouse-style wooden desk

Crafting a Rustic Charm: Building Your Own Farmhouse-Style Wooden Desk

Welcome to the world of DIY! We're about to embark on a journey of crafting a stunning farmhouse-style wooden desk that will bring warmth and character to your home office or workspace. This guide will walk you through every step, from gathering materials to adding finishing touches, ensuring you create a piece that reflects your unique style and provides a functional, inviting space for work or creative pursuits.

Planning Your Farmhouse Desk

Before diving into the construction, it's crucial to plan. Imagine your ideal desk â€" how large do you want it to be? What features are essential, like drawers, shelves, or a built-in keyboard tray? Consider the overall style â€" rustic farmhouse, modern farmhouse, or a blend? Once you have a vision, sketch it out, and start measuring your space to ensure your desk fits perfectly.

Gathering the Materials

Choose sturdy, rustic-looking wood for the top and legs. Reclaimed wood adds a unique touch, but you can also opt for new lumber. Consider these materials:

  • Wood for the top: Reclaimed barnwood, rough-cut pine, or oak.
  • Wood for the legs: 2x4s, 4x4s, or reclaimed beams.
  • Hardware: Screws, wood glue, hinges (if adding drawers), drawer slides, and finishing nails.
  • Tools: Saw, drill, sander, measuring tape, level, clamps, safety glasses, and a dust mask.
  • Finishing supplies: Wood stain, wood sealant, paint (optional), paintbrushes, and rags.

Building the Desk Base

Start by creating a sturdy frame for the desk. Here's a step-by-step guide:

  1. Cut the legs: Measure and cut your chosen wood to the desired height for the desk legs. Use a saw and ensure the cuts are precise.
  2. Assemble the frame: Connect the legs using sturdy screws and wood glue. You can create a simple rectangular frame, or add decorative elements like cross-bracing for added support and a charming look.
  3. Level and reinforce: Use a level to ensure the frame is perfectly square and stable. You can further reinforce the corners with metal brackets.

Creating the Farmhouse Desk Top

The desk top is the focal point of your farmhouse masterpiece. Here's how to craft it:

  1. Cut and join the wood planks: Measure and cut the wood planks for your desk top. Consider creating a rustic look by using wood of varying widths and thicknesses. Join the planks together using wood glue and screws, creating a sturdy and visually appealing top.
  2. Sanding and smoothing: Sand the top thoroughly to remove any rough edges or imperfections. Start with a coarse grit sandpaper and gradually work your way to finer grits for a smooth finish.

Adding Extra Touches

Now it's time to personalize your desk with unique features:

  • Drawers or shelves: If desired, add drawers or shelves to your desk. Measure and cut the wood for these components, assemble them using wood glue and screws, and attach them to the frame.
  • Built-in keyboard tray: For added comfort, create a built-in keyboard tray using a smaller piece of wood. Attach it beneath the desk top with hinges to allow for easy movement.
  • Decorative details: Add unique touches like decorative trim, metal accents, or even hand-painted details to your desk. Embrace your creativity!

Finishing Your Farmhouse Desk

Now, let's add the finishing touches to make your desk shine:

  1. Stain or paint: Apply your chosen wood stain or paint to the desk top and frame. Follow the manufacturer's instructions carefully for best results.
  2. Seal and protect: Apply a sealant to protect your desk from water, spills, and everyday wear and tear. Let it dry completely before using your new desk.

Congratulations! You've successfully crafted a beautiful and functional farmhouse-style wooden desk. Enjoy your new workspace and the satisfaction of creating something truly unique with your own hands.

Sunday, November 10, 2024

Diy grill gazebo: how to create a safe and fun cooking area

Posted by Alton with No comments
Diy grill gazebo: how to create a safe and fun cooking area

DIY Grill Gazebo: Creating a Safe and Fun Cooking Area

There's nothing quite like grilling up a feast for family and friends. But let's be honest, those hot summer days and unexpected rain showers can sometimes put a damper on your grilling plans. Building a DIY grill gazebo is a fantastic way to create a dedicated outdoor cooking space that's both safe and enjoyable, rain or shine. It's a project you can tackle yourself, adding a touch of personalized style to your backyard. Let's dive into the process and get your grill under cover!

Planning Your Grill Gazebo

The first step in any DIY project is meticulous planning. This will save you time and money in the long run. Here's a breakdown of what to consider before grabbing those tools:

1. Gazebo Size and Placement

Firstly, measure your grill and decide how much space you need around it. Consider how many people you typically entertain and the flow of traffic in your backyard. A comfortable space with adequate room for movement and grilling essentials is essential.

Also, choose a location that is level and easily accessible. Think about sun exposure, wind patterns, and proximity to power outlets if you're planning on incorporating electrical appliances.

2. Material Selection

The material for your gazebo frame is crucial. Popular choices include:

  • Aluminum: Lightweight, rust-resistant, and easy to work with. However, it may not be as sturdy as other options.
  • Steel: Strong and durable, but heavier and prone to rusting if not properly treated.
  • Wood: Offers a classic look and can be treated to resist rot and pests. However, it requires regular maintenance.

For the roof, you can go with:

  • Vinyl: Water-resistant and affordable, but may not be as durable as other options.
  • Canvas: Offers good protection from the elements and can be easily replaced if needed.
  • Metal: Durable and weather-resistant, but can get very hot in the sun.
  • Polycarbonate: Strong, lightweight, and lets in natural light. It's a great option if you want a gazebo that feels more open.

Remember, the best material for your grill gazebo will depend on your budget, aesthetic preferences, and the climate you live in.

3. Design and Style

Consider the overall style of your backyard and choose a design that complements your existing landscaping. You can create a classic gazebo with traditional wooden posts and a gabled roof or opt for a more modern design with sleek metal frames and a flat roof. Don't forget to think about details like lighting, ventilation, and storage.

Browse online for inspiration, check out local garden centers, or even consider sketching your own design. The possibilities are endless! Don't be afraid to let your personality shine through.

DIY Grill Gazebo Construction

Now that you've planned out your gazebo, let's get our hands dirty!

1. Foundation and Base

The foundation of your gazebo is crucial for stability. You can choose from a few different options, depending on your budget and experience:

  • Concrete piers: Offer the most solid and long-lasting foundation, but require some time and effort to pour and cure.
  • Metal posts: A good alternative to concrete, especially if you prefer a quicker installation. They can be anchored into the ground using concrete or a deep-set base.
  • Wood posts: Can be more affordable but require regular treatment to prevent rot and pests. They can be anchored into the ground with concrete or a pre-made post base.

Make sure the foundation is level before proceeding. You can use a spirit level to check for evenness.

2. Frame Construction

Once you've laid the foundation, it's time to build the frame. Start by connecting the vertical posts to the foundation using bolts or other sturdy fasteners. Make sure the posts are plumb and in the correct position before securing them.

Next, connect the horizontal beams that will form the roof and walls of your gazebo. Use angle brackets, plates, or other suitable connectors for stability. Double check all connections for tightness and evenness.

3. Roofing Installation

Now comes the fun part - putting up the roof! Follow the instructions for your chosen roofing material carefully. You'll likely need to attach supports, cut pieces to size, and secure them to the frame.

Remember to factor in ventilation by including openings for air circulation. This will help prevent condensation buildup and ensure a comfortable space, even on humid days.

4. Finishing Touches

You're almost there! Once the roof is secure, finish by adding any additional features you've planned, such as:

  • Side panels: For privacy and protection from the elements. You can use fabric, wood, or other materials.
  • Gutters: To direct rainwater away from the gazebo and prevent flooding.
  • Lighting: String lights, LED panels, or even a ceiling fan for extra ambiance.
  • Storage: Shelves, hooks, or cabinets to keep grilling tools and accessories organized.

Don't forget to consider the overall safety of your grill gazebo. Install smoke detectors, fire extinguishers, and make sure there's adequate ventilation to avoid carbon monoxide buildup.

Safety First

While building a DIY grill gazebo can be incredibly rewarding, safety should always be your top priority. Here are some key tips to keep in mind:

  • Never grill indoors or in an enclosed area. Always grill in a well-ventilated space.
  • Keep your grill clean and free of grease buildup. Clean your grill after each use.
  • Use only approved fuels for your grill. Follow the manufacturer's instructions for fuel types and usage.
  • Never leave a grill unattended. Always supervise your grill and ensure it is completely extinguished before leaving it.
  • Keep children and pets away from the grill area. Set up a designated grilling zone and keep youngsters and furry friends at a safe distance.
  • Have a fire extinguisher readily available. It's always a good idea to have a fire extinguisher handy in case of emergency.

By following these safety tips, you can create a grilling space that's both fun and secure.

Enjoying Your New Grill Gazebo

Congratulations! You've created a safe and enjoyable outdoor cooking space. Now it's time to gather friends and family, fire up the grill, and enjoy the fruits of your labor.

Remember, your DIY grill gazebo is a personal project. Feel free to personalize it further by adding decorative accents, hanging plants, or incorporating unique features that reflect your taste.

With your new grill gazebo, you'll be ready to host unforgettable outdoor gatherings for years to come. Happy grilling!

How to build a grill gazebo with multiple cooking stations

Posted by Alton with No comments
How to build a grill gazebo with multiple cooking stations

Building a Multi-Station Grill Gazebo: Your Outdoor Culinary Haven

Imagine this: a sprawling outdoor kitchen, complete with multiple cooking stations, sheltered by a stylish gazebo, where you can whip up culinary masterpieces while enjoying the fresh air. This is the dream of many grill enthusiasts, and it's achievable with a little planning and effort. Building a multi-station grill gazebo is a project that combines functionality, aesthetics, and a touch of backyard luxury. Let's dive into the exciting world of crafting this ultimate outdoor grilling haven.

Planning Your Dream Grill Gazebo

Before you start wielding a hammer and saw, a solid plan is crucial. Think about how you envision your outdoor kitchen functioning. How many people will you typically cook for? What types of grilling and cooking do you enjoy? What's your budget? Consider these questions and more while you gather inspiration from online resources, magazines, and even existing outdoor kitchens.

Defining Your Needs

Start by listing the cooking stations you want to include. Do you dream of a smoker, a pizza oven, a dedicated grill station, a side burner, or maybe even a mini-fridge for cold beverages? Once you have a list of desired features, consider their space requirements. Measure your yard and plot out the potential size and layout of your gazebo.

Choosing the Gazebo Style

The gazebo style sets the tone for your entire outdoor kitchen. Do you envision a classic, elegant look with a wooden structure and a canvas roof? Or maybe a modern, minimalist design with aluminum framing and a retractable canopy? Research various styles and materials to find what best suits your preferences and budget.

Building the Foundation: A Stable Base for Your Culinary Haven

The foundation of your gazebo is the bedrock of its stability and longevity. A sturdy foundation can withstand weather, ensure the gazebo stays level, and provide a solid base for your grilling stations. The type of foundation you need depends on your local building codes, soil conditions, and the weight of your gazebo.

Concrete Foundation

For heavy, permanent gazebos, a concrete foundation is the most robust option. It involves pouring concrete into a pre-dug hole, reinforcing it with rebar, and creating a level platform. While labor-intensive, it offers lasting durability and peace of mind.

Precast Concrete Pads

A more accessible alternative to a poured concrete foundation, precast concrete pads provide a solid base for your gazebo. These are pre-made concrete slabs that are simply placed and leveled on a prepared area. They're faster to install and generally cost less than poured concrete.

Wooden Deck or Patio

If you already have a wooden deck or patio, you might be able to integrate the gazebo into your existing structure. Check that the deck or patio meets the weight requirements of the gazebo and make sure to anchor it securely.

Constructing the Gazebo Framework: Bringing Your Design to Life

With the foundation secured, you're ready to build the gazebo's framework. This is the structural backbone that will support the roof and provide a safe, durable base for your cooking stations. The construction process involves assembling the posts, beams, and rafters using appropriate tools and following your gazebo's instructions.

Choosing the Right Materials

Gazebo frameworks are typically constructed from wood, aluminum, or a combination of both. Wood provides a classic look and warmth, while aluminum offers durability and low maintenance. Consider your budget, the climate you live in, and your aesthetic preferences when making your choice.

Assembling the Structure

The process of assembling the framework involves carefully attaching the posts to the foundation, connecting the beams and rafters, and ensuring the structure is plumb and level. If you lack experience in carpentry, consider hiring a professional for this step. Following the manufacturer's instructions meticulously is crucial for a safe and stable gazebo.

Adding the Roof: Shelter From the Elements

The roof is the crowning touch of your gazebo, providing protection from the elements and completing the overall design. There are various roofing options, ranging from traditional canvas to sleek metal panels, offering a range of aesthetics and durability.

Canvas Roof

A classic and versatile option, canvas roofs offer a traditional, elegant look while allowing for airflow. They come in various colors and patterns and can be easily replaced if needed.

Metal Roof Panels

Metal roofing panels provide durability and longevity, offering protection from wind, rain, and UV rays. They come in various styles and colors, allowing you to match your gazebo's aesthetic.

Polycarbonate Panels

Polycarbonate panels are lightweight, durable, and allow light to filter through, creating a bright and airy space. They're a great option for areas where you want natural light to penetrate.

Designing the Cooking Stations: Where the Magic Happens

Now comes the fun part: designing your cooking stations! This is where your culinary vision takes shape. Consider the layout, materials, and appliances to create a truly unique outdoor kitchen.

Layout and Placement

Think about the flow of your outdoor kitchen. Place the grill station where you want to be the center of attention, and position other appliances like a smoker or pizza oven strategically. Ensure ample counter space and walking room for safe and comfortable cooking.

Material Choices

Materials for countertops and cabinetry can range from durable stainless steel and granite to more rustic options like wood and concrete. Choose materials that resist heat and moisture and complement your gazebo's style.

Appliances and Accessories

Choose your cooking appliances based on your culinary interests and budget. A high-quality grill is essential, along with other appliances like a smoker, side burner, pizza oven, or even a mini-fridge. Don't forget to add essential accessories like storage drawers, hooks, and lighting for a functional and comfortable setup.

Adding Finishing Touches: Transforming Your Gazebo into a Culinary Retreat

Once the structure and cooking stations are in place, it's time to personalize your gazebo and create a welcoming ambiance. Add features that enhance both the functionality and aesthetic appeal of your outdoor kitchen.

Lighting

Adequate lighting is crucial for nighttime grilling and entertaining. Consider installing outdoor lighting, either string lights, lanterns, or even integrated ceiling lights, to create a warm and inviting atmosphere.

Furniture and Decor

Complete the look with comfortable outdoor furniture, a rug, and decorative elements that reflect your style. Choose materials that are weather-resistant and durable, and ensure you have enough seating for all your guests.

Storage and Organization

Keep your outdoor kitchen tidy and organized with built-in storage compartments, shelves, or cabinets. Store grilling tools, utensils, and dishes within easy reach for hassle-free cooking.

Final Touches and Enjoyment

With your multi-station grill gazebo complete, it's time to savor the fruits of your labor. Enjoy the thrill of grilling, smoking, and creating delicious meals in your personal culinary haven. Remember to maintain your gazebo regularly, clean your cooking stations, and enjoy countless hours of outdoor cooking and entertaining with friends and family.

Diy wooden gun case: a step-by-step building guide

Posted by Alton with No comments
Diy wooden gun case: a step-by-step building guide

DIY Wooden Gun Case: A Step-by-Step Building Guide

A well-crafted wooden gun case provides secure storage and a touch of elegance to your firearms collection. Building your own case allows you to customize its size, design, and features to perfectly suit your needs. This comprehensive guide will walk you through the process, step-by-step, from planning to finishing, enabling you to create a durable and aesthetically pleasing gun case.

Step 1: Planning and Design

Before you start cutting wood, carefully plan the dimensions and features of your gun case. Consider the following factors:

1.1 Gun Dimensions

Measure the length, width, and height of the firearm(s) you intend to store in the case. Add some extra inches to allow for comfortable handling and padding. For example, add 1-2 inches to the length for a snug fit.

1.2 Number of Firearms

Determine the number of guns you want to store in the case. If you intend to store multiple firearms, ensure you provide ample space between them to avoid damage.

1.3 Design Features

Decide on the desired features for your gun case. Do you want a simple box or a more elaborate design with compartments, hinges, a lock, or a carrying handle? Consider incorporating features that enhance functionality and security.

1.4 Material Selection

Choose the appropriate wood for your gun case. Some popular options include:

  • Hardwoods like oak, walnut, and cherry offer durability, rich color, and beautiful grain patterns. These woods are suitable for high-end cases.
  • Softwoods like pine and cedar are more affordable and lightweight. They are good for basic cases.
  • Plywood provides a stable and cost-effective option for construction. It's readily available in various thicknesses and veneers.

Step 2: Cutting and Assembling the Case

After finalizing your design, cut the wood pieces according to your measurements. Use a table saw, circular saw, or handsaw for precise cuts.

2.1 Cutting the Sides and Bottom

Cut two identical side pieces, two identical top and bottom pieces, and one bottom piece.

2.2 Cutting the Interior Dividers

If you are building a case for multiple firearms, cut interior dividers to separate the gun compartments. These dividers should be slightly shorter than the case's height to allow for padding.

2.3 Assembling the Case

Glue and screw the sides, top, and bottom together. Use wood glue for a strong bond and screws for added support. Secure the dividers in place using glue and screws as well. Clamps can help maintain pressure while the glue dries.

Step 3: Adding Padding and Interior Features

Protect your firearms with proper padding inside the case.

3.1 Padding

Line the interior of the case with soft padding materials, such as:

  • Foam: Provides excellent cushioning and comes in various densities.
  • Felt: Soft and abrasion-resistant, it helps prevent scratches.
  • Velvet: Adds a luxurious touch and protects firearms from dust.

Secure the padding using glue, staples, or tacks.

3.2 Interior Features

Add any desired interior features, such as:

  • Storage compartments for magazines, cleaning supplies, or other accessories.
  • Slots for holding specific tools or accessories.
  • A removable tray for easy access to firearms.

Consider using wood, plastic, or metal for constructing these features.

Step 4: Installing Hinges and a Lock

If you're incorporating hinges and a lock, install them at this stage.

4.1 Hinge Installation

Choose hinges that match the size and style of your case. Mark the positions for the hinges on the case lid and the body. Use wood screws or nails to secure the hinges. Ensure they are placed evenly and securely.

4.2 Lock Installation

Install the lock in a secure location on the case lid. Use a drill and Forstner bit to create a recess for the lock mechanism. Attach the lockplate to the case lid using screws. Ensure the lock functions smoothly and securely.

Step 5: Finishing Touches

After completing the construction and adding the desired features, it's time to finish your gun case.

5.1 Sanding

Sand the entire case surface using progressively finer grit sandpaper (from coarse to fine) to achieve a smooth finish. Pay attention to edges and corners.

5.2 Staining or Painting

Apply stain or paint to give the case its desired color and appearance. If staining, use a brush or cloth to apply a thin, even coat. Allow the stain to dry completely before applying a protective finish. For painting, use a brush, roller, or spray gun to apply multiple thin coats. Allow each coat to dry thoroughly before applying the next.

5.3 Protective Finish

Seal the wood surface to protect it from scratches, moisture, and wear. Consider using:

  • Polyurethane: Durable and water-resistant.
  • Varnish: Provides a high-gloss finish.
  • Wax: Natural and easy to apply, but less durable.

Apply the protective finish according to the manufacturer's instructions. Multiple thin coats are generally recommended for a more durable finish.

5.4 Hardware

Add any decorative hardware like brass accents, leather straps, or metal corners for an extra touch of elegance.

Step 6: Final Inspection and Enjoyment

Once the finishing touches are complete, inspect your gun case thoroughly. Ensure all parts are securely attached, and the hinges and lock function smoothly.

Enjoy your handcrafted wooden gun case, knowing you have created a piece of art that will safely store your firearms for years to come. Customize your case with engravings, inlays, or other personal touches to make it truly unique.

Wooden gun cabinet diy: tips for a secure and attractive design

Posted by Alton with No comments
Wooden gun cabinet diy: tips for a secure and attractive design

Building a Secure and Stylish Wooden Gun Cabinet: A DIY Guide

A gun cabinet isn't just a storage solution; it's a vital safety measure for responsible gun owners. Ensuring both security and aesthetic appeal is crucial, and building your own wooden gun cabinet offers a unique opportunity to achieve both. This guide will walk you through the essential steps, equipping you with tips and techniques to create a sturdy, attractive, and secure sanctuary for your firearms.

Planning Your Gun Cabinet

Before you grab your tools, take time to envision your ideal cabinet. Consider the following:

Size and Capacity

Determine the number and size of firearms you need to store. Measure your collection and consider future acquisitions. You'll need enough space to accommodate your guns comfortably, and a bit of room for accessories.

Style and Design

Think about the aesthetic you want to achieve. Will the cabinet blend with your existing furniture or serve as a statement piece? Sketch out ideas, research different styles (traditional, modern, rustic) and explore online for inspiration.

Security Features

Security is paramount. Choose a strong wood like oak or maple for the frame. Incorporate features like:

  • Solid steel door: Prevents easy entry and provides a sturdy barrier.
  • Multiple locking points: Use at least two, preferably three, locking points on the door for maximum security.
  • High-quality hinges: Secure hinges resist tampering and provide a smooth, quiet operation.
  • Heavy-duty lock: Choose a robust lock with a high-security rating, preferably a pick-resistant model.

Materials and Tools

Choose the right materials for your cabinet:

Wood Selection

Consider hardwood options like oak, cherry, maple, walnut, or hickory for their strength and durability. Softwoods like pine are less suitable for the frame but can be used for internal shelves.

Hardware and Fasteners

Invest in quality hinges, locks, and fasteners. Use heavy-duty screws, bolts, and corner brackets to ensure structural integrity.

Tools

Gather the necessary tools for woodworking:

  • Table saw
  • Miter saw
  • Router
  • Drill
  • Sandpaper
  • Clamps
  • Measuring tape
  • Level
  • Pencil

Construction Process

Follow these steps for constructing your gun cabinet:

Cutting and Assembling the Frame

Cut the wood to your desired dimensions using a table saw or miter saw. Ensure precise cuts for a stable frame. Assemble the frame using wood glue and screws, reinforcing joints with corner brackets for added strength.

Adding Shelves and Internal Components

Cut and install shelves using adjustable shelf brackets. Add storage compartments, compartments for magazines, or other desired features. Consider using softwood for internal components to reduce weight.

Installing the Door

Prepare the door by cutting the wood to size and attaching the hinges to the frame. Use a chisel to create a mortise for the lock if necessary. Install the door using screws and secure the hinges with screws.

Finishing and Securing the Cabinet

Sand the entire cabinet to smooth out rough edges and imperfections. Apply a stain or paint to achieve your desired finish. Once dry, install the lock and secure it firmly. Ensure a proper fit and function.

Safety and Security Tips

Remember, your gun cabinet is meant to be a secure storage solution. Consider the following:

  • Secure Anchoring: Bolt the cabinet securely to the wall or floor to prevent theft or accidental movement.
  • Concealment: Consider positioning the cabinet in a discreet location, out of sight from potential intruders.
  • Fire Protection: Install a fireproof safe inside the cabinet for storing ammunition. Consider a fireproof rating for the cabinet itself.
  • Regular Inspection: Inspect the cabinet regularly for any signs of wear, damage, or tampering. Replace worn-out parts promptly.

Final Thoughts

Building a wooden gun cabinet is a rewarding DIY project that combines craftsmanship, security, and style. By following these tips and taking the time to plan and execute your design, you can create a secure and attractive storage solution for your firearms. Remember, responsible gun ownership includes proper storage, and a well-built wooden gun cabinet is an essential investment in safety and peace of mind.

Saturday, November 9, 2024

How to build a handmade gun cabinet with multiple shelving options

Posted by Alton with No comments
How to build a handmade gun cabinet with multiple shelving options


For firearm owners, a secure and well-organized storage solution is paramount. A handcrafted gun cabinet offers not only a secure sanctuary for your firearms but also an opportunity to create a custom piece that complements your home decor. This comprehensive guide provides detailed instructions on building a robust and versatile gun cabinet with multiple shelving options.

Planning and Design Considerations:

1. Define Your Needs: Before embarking on the construction, carefully assess your requirements. Determine the number of firearms you need to store, their dimensions, and any additional accessories like scopes, ammunition, or cleaning kits.

2. Choose Your Materials: The most popular choices for gun cabinet construction are:
Hardwoods: Oak, maple, cherry, and walnut offer durability, strength, and aesthetically pleasing grains.
Softwoods: Pine and cedar are more affordable but require additional protection from moisture and scratches.
Plywood: A less expensive option, plywood provides a stable base for construction. Consider using marine-grade plywood for enhanced moisture resistance.

3. Design the Cabinet: Sketch your desired cabinet layout, specifying dimensions, the number of shelves, and any special features. Consider incorporating a lockable drawer for smaller accessories or a built-in ammunition storage compartment.

Material Selection and Preparation:

1. Wood Selection: Carefully choose wood with minimal knots and imperfections. Ensure the wood is dry and acclimated to your workshop environment to prevent warping.

2. Cutting and Shaping: Utilize a table saw, miter saw, or circular saw to precisely cut the cabinet components. Ensure accurate measurements to avoid misalignment. Sand all edges and surfaces to remove any rough spots and prepare for finishing.

Cabinet Construction:

1. Building the Cabinet Frame:
Construct the Sides: Cut two identical side pieces from your chosen wood.
Assemble the Bottom: Attach the cabinet bottom to the sides using pocket holes, dowels, or mortise and tenon joints. Securely fasten the joints with wood glue and screws.
Construct the Back: Cut a piece of plywood or solid wood to fit the back of the cabinet and attach it to the sides and bottom.
Add Support Braces: If necessary, install additional support braces for added strength, especially if you're using thinner wood or plan to store heavier firearms.

2. Creating Shelving:
Shelf Support System: Choose a method for supporting the shelves.
Adjustable Shelving: Opt for a system with adjustable shelf pins or brackets for flexible storage.
Fixed Shelving: Build sturdy shelves that are permanently attached to the cabinet sides and back.
Cut Shelf Pieces: Cut shelves to the desired length and width. Ensure a tight fit to prevent sagging.
Attach Shelves: Securely attach the shelves using wood glue and screws or dowels.

3. Adding a Door and Lock Mechanism:
Door Construction: Choose a suitable door design. Popular options include solid wood doors, paneled doors, or glass-inset doors.
Cutting and Fitting: Cut the door pieces and assemble them using a rabbet joint for a clean, sturdy connection.
Installing Hinges: Attach strong hinges to the cabinet side and door, allowing for smooth opening and closing.
Lock Mechanism: Install a high-quality lock for security. Choose a lock that aligns with your security needs and local regulations.

Finishing Touches:

1. Sanding: Smoothly sand all surfaces with progressively finer grit sandpaper, starting with coarse grit to remove imperfections and ending with fine grit for a smooth finish.

2. Finishing: Apply a suitable finish to protect the wood and enhance its aesthetic appeal.
Oil-Based Finishes: Penetrating oil finishes provide durability and bring out the wood's natural grain.
Polyurethane Finishes: Water-based or oil-based polyurethane varnishes offer a tough protective layer and a high-gloss sheen.
Stain: Use a wood stain to achieve a desired color and enhance the wood grain.

3. Adding Hardware: Attach handles, door knobs, or any other decorative hardware for functionality and aesthetics.

Safety Considerations:

Fire Safety: Avoid storing firearms in an area exposed to direct sunlight, heat, or humidity. Ensure proper ventilation in the storage area.
Security: Use strong locks and security measures to deter unauthorized access to your firearms.
Storage Practices: Store ammunition separately from firearms to prevent accidental discharge. Properly label all containers to avoid confusion.

Conclusion:

Building a custom gun cabinet offers a fulfilling DIY project and provides a secure and organized storage solution for your firearms. With careful planning, precise craftsmanship, and quality materials, you can create a gun cabinet that meets your specific needs and enhances the safety and aesthetics of your home. Remember to prioritize safety and comply with local firearm storage regulations throughout the construction and use of your gun cabinet.

Diy guide to building a wooden gun cabinet with adjustable storage

Posted by Alton with No comments
Diy guide to building a wooden gun cabinet with adjustable storage


For firearm enthusiasts, a secure and organized storage solution is paramount. While pre-made gun cabinets offer convenience, a custom-built cabinet provides the ultimate in tailored functionality and aesthetic appeal. This guide will lead you through the process of constructing a sturdy and adaptable wooden gun cabinet with adjustable shelving to meet your specific needs.

I. Planning and Preparation

A. Define Your Requirements:

1. Dimensions: Consider the number and size of firearms you intend to store, and allow ample room for future additions. Measure your designated space carefully and account for wall thickness and any obstructions.
2. Style and Design: Choose a style that complements your existing decor. Determine the desired number of shelves and compartments for rifles, handguns, ammunition, and accessories. Think about features like a locking door, keyholes, or an internal light.
3. Materials: Opt for durable hardwoods like oak, maple, or cherry for a long-lasting and aesthetically pleasing finish. Pine or plywood can be used for interior shelves and components, offering a more affordable option.
4. Tools and Supplies:

Power Tools: Table saw, circular saw, drill, jigsaw, router, sander, drill press (optional)
Hand Tools: Hammer, screwdriver, tape measure, level, pencil, chisels, clamps
Materials: Wood (lumber, plywood), screws, nails, hinges, lockset, hinges, stain, paint, clear coat, wood glue

B. Sketching and Design:

1. Develop a Blueprint: Draw a detailed plan outlining the cabinet's dimensions, shelf locations, door design, and any other features.
2. Choose a Construction Method: Consider various joinery techniques such as dado joints, mortise and tenon, pocket holes, or simple butt joints. Select a method appropriate to your skill level and the desired aesthetic.

II. Construction Process:

A. Cutting and Assembling the Frame:

1. Cut Lumber: Precisely cut all frame pieces to the dimensions indicated in your blueprint. Utilize a table saw or circular saw for accurate cuts.
2. Prepare Joints: If using dado or mortise and tenon joints, carefully create the necessary slots or holes for precise fit.
3. Assemble the Frame: Glue and screw the frame pieces together, ensuring squareness and stability. Use clamps to secure the joints while the glue dries.
4. Add Interior Support: If necessary, construct additional internal supports for shelves or drawers.

B. Creating Shelves and Compartments:

1. Cut Shelf Material: Measure and cut plywood or lumber for shelves according to your design.
2. Add Shelf Supports: Install shelf supports using screws or dado joints on the cabinet's interior walls.
3. Install Shelves: Secure the shelves to the supports with screws or glue, ensuring a level and stable fit.

C. Building the Door:

1. Construct the Door Frame: Cut and assemble the door frame using methods similar to the cabinet frame construction.
2. Add Paneling (Optional): If desired, create a panel design for the door using plywood or a routed frame.
3. Install Hardware: Attach hinges to the door frame and cabinet. Install the lockset, ensuring proper alignment.

D. Finishing Touches:

1. Sanding and Refinishing: Sand the entire cabinet, including the interior, to achieve a smooth surface. Apply stain, paint, or a clear coat as desired.
2. Install Additional Features: Add optional features like a lockable compartment for ammunition, internal lighting, or custom accessories.

III. Advanced Customization and Considerations:

A. Adjustable Shelves:

1. Slotted Shelf Supports: Create slots in the cabinet's sidewalls to allow for adjustable shelf heights.
2. Pin and Hole System: Utilize pins and holes to secure shelves at various positions, offering greater flexibility.
3. Adjustable Shelf Pins: Use commercially available shelf pins that slide into predrilled holes for adjustable placement.

B. Locking Mechanisms:

1. Combination Locks: Provide extra security with combination locks instead of traditional key locks.
2. Electronic Locks: Consider incorporating electronic locks for enhanced security and convenience.
3. Internal Locking Features: Implement internal locking features like a shelf locking system or a drawer with a separate lock.

C. Other Considerations:

1. Fire Safety: Install a fireproof safe within the cabinet for storing sensitive documents or valuable items.
2. Humidity Control: Consider adding humidity control features to prevent moisture damage to firearms.
3. Customizable Accessories: Design and incorporate custom shelves, dividers, and hooks for organizing accessories like cleaning supplies, scopes, and tools.

IV. Safety and Legal Compliance:

1. Storage Safety: Ensure the cabinet is securely fastened to the wall or floor to prevent accidental tipping.
2. Childproof Locks: Use childproof locks on all cabinets and drawers containing firearms to prevent access by children.
3. Local Laws and Regulations: Comply with all local laws and ordinances regarding firearm storage.

V. Conclusion:

Building a custom wooden gun cabinet is a rewarding project that combines woodworking skills with personalized design elements. By carefully planning and executing the construction process, you can create a secure, stylish, and fully functional storage solution for your firearms. Remember to prioritize safety, adhere to local regulations, and enjoy the satisfaction of crafting a project that enhances your firearm ownership experience.

DIY Birdhouse: How to Build One with a Sloping Roof

Posted by Alton with No comments
DIY Birdhouse: How to Build One with a Sloping Roof


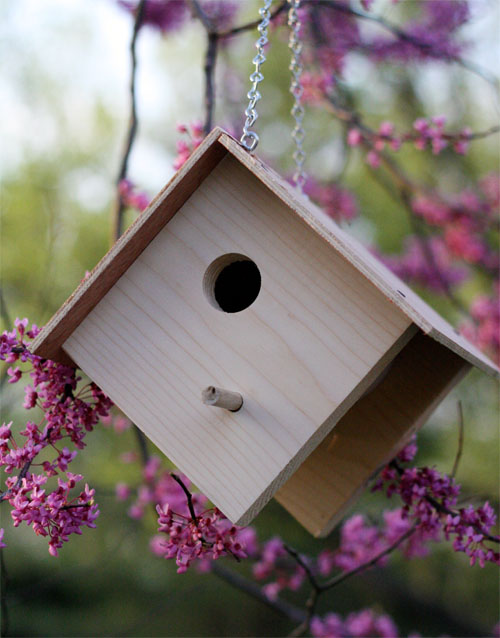
Creating a welcoming haven for feathered friends in your backyard is a rewarding experience. A well-constructed birdhouse provides shelter and encourages birds to nest and raise their young, adding a vibrant touch to your outdoor space. This guide will walk you through the process of building a charming birdhouse with a sloping roof, suitable for a variety of small bird species.

Materials:

Wood: Choose weather-resistant wood like cedar, redwood, or pine. You will need:
1 x 6-inch boards: For the base and roof
1 x 4-inch boards: For the sides and the roof slope
1/2-inch plywood: For the floor and the roof overhang
Screws: 1 1/4-inch wood screws
Nails: 1 1/4-inch finishing nails
Wood glue: For added strength and durability
Paint or stain: Choose a color that blends well with your surroundings
Roofing shingles: Asphalt shingles or cedar shakes (optional)
Hardware cloth: For ventilation and to deter predators
Entry hole: Pre-drilled or cut to the size of your target bird species
Measuring tape: For accurate measurements
Pencil: For marking
Saw: Hand saw or circular saw
Drill: With a drill bit size matching the screw size
Screwdriver: For attaching the screws
Hammer: For driving in nails
Sandpaper: To smooth edges
Safety goggles: To protect your eyes
Gloves: For hand protection

Steps:

1. Designing the Birdhouse:

Dimensions: Consider the size of your target bird species. For small birds like chickadees and wrens, a 4 x 4 x 6-inch birdhouse is suitable.
Entry Hole: The entry hole should be slightly larger than the bird's head. For small birds, a 1 1/2-inch diameter hole is a good starting point. Place the entry hole 6 inches from the bottom of the birdhouse for easy access.
Roof Shape: A sloping roof ensures water drainage. Aim for a 15-degree slope for optimal water runoff.
Ventilation: Drill a few 1/4-inch diameter holes near the top of the side walls to provide ventilation.

2. Cutting the Wood:

Base: Cut two 4 x 6-inch pieces from the 1 x 6-inch board for the base.
Sides: Cut two 4 x 6-inch pieces from the 1 x 4-inch board for the sides.
Roof: Cut two 6 x 6-inch pieces from the 1 x 6-inch board for the roof panels.
Roof Slopes: Cut two 4 x 4-inch pieces from the 1 x 4-inch board for the roof slopes.
Floor: Cut a 4 x 4-inch piece from the plywood for the floor.
Roof Overhang: Cut two 5 x 6-inch pieces from the plywood for the roof overhang.

3. Assembling the Birdhouse:

Sides and Base: Apply wood glue to the edges of the base pieces and attach the sides using 1 1/4-inch wood screws.
Floor: Glue and attach the plywood floor to the inside of the birdhouse base.
Roof Panels: Glue and attach the two roof panels to the top of the birdhouse using 1 1/4-inch wood screws.
Roof Slopes: Glue and attach the roof slopes to the top of the roof panels using 1 1/4-inch wood screws.
Roof Overhang: Glue and attach the roof overhangs to the underside of the roof panels, creating an overhang to protect the entry hole.

4. Adding the Entry Hole:

Pre-Drilled Hole: Use a drill bit slightly smaller than the desired entry hole diameter. Drill the hole through the side wall, ensuring it is centered and at the correct height.
Cut Hole: If using a pre-cut entry hole, carefully cut the hole in the side wall using a saw. Smooth the edges with sandpaper.

5. Adding Ventilation and Predator Protection:

Hardware Cloth: Cut a piece of hardware cloth slightly larger than the entry hole. Attach it to the inside of the birdhouse around the entry hole, using nails or staples. This will prevent larger predators from accessing the nest box.
Ventilation Holes: Drill several 1/4-inch diameter holes near the top of the side walls for ventilation.

6. Finishing Touches:

Sanding: Sand all the surfaces of the birdhouse to smooth out any rough edges and create a more polished look.
Painting or Staining: Apply a coat of weather-resistant paint or stain to protect the wood and add a touch of color.
Roofing Shingles: If desired, attach asphalt shingles or cedar shakes to the roof for added durability and visual appeal.

7. Placing the Birdhouse:

Location: Choose a location with ample sunlight and protection from strong winds.
Height: Mount the birdhouse 5-8 feet above the ground to deter predators.
Orientation: Ensure the entry hole faces away from prevailing winds and rain.

8. Monitoring the Birdhouse:

Cleaning: Clean the birdhouse annually after nesting season to prevent disease.
Observation: Watch for bird activity and adjust your design or location as needed.

Additional Tips:

Bird Species: Research the specific needs of the bird species you want to attract to determine the appropriate size and entry hole diameter.
Maintenance: Check the birdhouse regularly for signs of wear and tear and perform any necessary repairs.
Safety: Always wear safety goggles and gloves when working with power tools and sharp objects.

Conclusion:

Building a birdhouse is a rewarding project that enhances your backyard and provides a safe haven for birds. By following these comprehensive instructions, you can craft a charming and functional birdhouse that will attract feathered friends to your garden, adding life and beauty to your surroundings. Remember, careful planning, attention to detail, and responsible placement are key to creating a successful birdhouse that provides a safe and comfortable home for generations of birds to come.

Wooden clock diy: step-by-step tutorial

Posted by Alton with No comments
Wooden clock diy: step-by-step tutorial


Embark on a rewarding journey of crafting a timeless treasure with this comprehensive guide to building a wooden clock. This project combines woodworking skills with the satisfaction of creating a functional and aesthetically pleasing timepiece, a unique addition to any space.

Materials Needed:

Wood:
Base: Select a sturdy, aesthetically pleasing wood for the clock base. Consider hardwoods like oak, maple, or cherry for durability and elegance, or pine for a rustic aesthetic. The size will depend on your design, but aim for a base that comfortably accommodates the clock mechanism and any additional design elements.
Clock face: Use a thin, smooth wood like plywood or MDF (medium-density fiberboard) for the clock face. The size should accommodate the clock mechanism and any additional decorative elements.
Clock Movement: Choose a quartz movement with hands, ideally one that includes a mounting nut or bracket for secure attachment.
Clock Hands: Select hands that complement the clock movement and the overall design aesthetic.
Wood Glue: Use a high-quality wood glue for strong, permanent bonds.
Wood Stain (optional): Select a stain that complements the chosen wood.
Wood Finish (optional): Choose a finish like polyurethane or wax for protection and desired sheen.
Sandpaper: A range of grit sandpaper (from coarse to fine) is necessary for smoothing surfaces and creating a polished finish.
Measuring Tape: Essential for accurate measurements and cutting.
Pencil: Used for marking and sketching.
Saw: Use a hand saw or power saw for precise cutting of wood. Consider a jigsaw for intricate designs.
Drill: Used for drilling pilot holes before screwing, and potentially for creating intricate details.
Screws: Select screws suitable for the wood types used and the clock movement's mounting requirements.
Clamps: Used to hold wood securely during glue-up and for applying pressure while the glue dries.
Safety Gear: Always wear safety glasses and a dust mask during woodworking.

Step-by-Step Guide:

1. Design and Planning:

Conceptualize: Decide on the design and size of your clock. Consider the style (modern, rustic, minimalist, etc.), shape (round, square, rectangular, etc.), and any decorative elements.
Sketching: Draw a detailed sketch of your clock design, including dimensions and any intricate details.
Materials Selection: Choose the appropriate wood type for the base and clock face based on your design and personal preference.
Clock Mechanism: Select a suitable quartz movement with hands that align with your design.
Measurement: Measure the chosen wood and mark the required dimensions for cutting.

2. Cutting and Shaping:

Base Cutting: Using a saw, carefully cut the wood to the desired size and shape for the base of your clock. For intricate shapes, a jigsaw is ideal.
Clock Face Cutting: Cut the clock face wood to the appropriate size to accommodate the clock movement and any decorative elements. Aim for a slightly larger diameter than the clock movement to provide ample space for mounting.
Smoothing and Sanding: Sand the cut edges of both the base and the clock face to create a smooth and polished finish. Use a range of sandpaper grits, starting with coarser grits for initial shaping and finishing with finer grits for a smooth surface.

3. Assembling the Base:

Design Considerations: The base assembly can be a simple, rectangular piece or a more complex design with multiple layers or decorative elements. Your design will dictate the specific steps.
Glue-up: Apply wood glue to the surfaces that will be joined. Carefully align the pieces and clamp them together firmly, ensuring even pressure distribution. Allow the glue to dry completely according to the manufacturer's instructions.
Screws (Optional): For added strength, consider reinforcing the joint with screws. Pre-drill pilot holes to prevent wood splitting.
Sanding (Optional): If desired, sand the assembled base to smooth out any imperfections and create a consistent surface for the clock face.

4. Preparing the Clock Face:

Centering: Use a pencil and ruler to determine the exact center of the clock face.
Pilot Holes: Drill two pilot holes at the center of the clock face, using a drill bit slightly smaller than the screw size of the clock movement's mounting nut or bracket.
Attaching the Clock Mechanism: Securely attach the clock movement to the clock face using the mounting nut or bracket provided. Ensure the movement is centered and level.

5. Attaching the Clock Face to the Base:

Positioning: Center the clock face on the base, ensuring it is level.
Gluing (Optional): Apply a small amount of wood glue to the back of the clock face, focusing on the center area where the clock movement is attached.
Securing: Carefully press the clock face onto the base, ensuring alignment. Use clamps if necessary to hold the clock face securely in place while the glue dries.
Screws (Optional): For added stability, consider attaching the clock face to the base using screws through the pilot holes.

6. Finishing Touches:

Sanding (Optional): Sand the entire clock surface, including the base and clock face, to smooth out any imperfections and prepare it for finishing.
Staining (Optional): If desired, apply a wood stain to enhance the natural beauty of the wood and achieve the desired color.
Finishing (Optional): Apply a wood finish like polyurethane or wax to protect the wood and create the desired sheen. Multiple coats may be needed, allowing each coat to dry completely between applications.

7. Installing the Clock Hands:

Clock Hands: Carefully attach the clock hands to the clock movement according to the manufacturer's instructions.
Alignment: Ensure the hands are properly aligned with the clock movement and are securely fastened.
Test: Set the time on the clock movement and check that the hands move freely and accurately.

8. Adding Personal Touches:

Decorative Elements: Consider adding personal touches to your clock like engraved names, dates, or decorative patterns using wood burning techniques or decoupage.
Hardware: Select suitable hardware like clock hands, a hanging hook, or a stand, keeping the overall design aesthetic in mind.

Conclusion:

Building a wooden clock is a rewarding project that combines woodworking skills with artistic expression. The finished product serves as a testament to your craftsmanship and provides a beautiful, functional addition to your home. Remember to always prioritize safety, take your time with each step, and enjoy the process of creating your own timeless treasure.

Diy wooden gun cabinet: how to add glass doors for display

Posted by Alton with No comments
Diy wooden gun cabinet: how to add glass doors for display


A well-constructed gun cabinet is an essential investment for responsible firearm ownership. Not only does it ensure the safe storage of your firearms, but it also serves as a deterrent against unauthorized access. While a basic wooden cabinet effectively protects your firearms from theft, adding glass doors elevates the functionality and aesthetic appeal, allowing you to showcase your collection while maintaining security. This guide will provide you with the necessary steps to install glass doors on your DIY wooden gun cabinet, transforming it into a secure and stylish display piece.

Step 1: Assessing Your Cabinet and Planning the Installation

Before embarking on the project, meticulously assess your existing wooden cabinet. This includes:

Cabinet Dimensions: Precisely measure the interior and exterior dimensions of the cabinet, ensuring you have ample clearance for the glass doors and any decorative framing.
Existing Hardware: Identify the type of hinges and locking mechanisms currently in use. Understanding the existing hardware will help determine if any modifications or replacements are needed.
Glass Thickness and Type: Select the appropriate glass thickness based on the size and weight of the doors, considering factors like impact resistance and clarity. Tempered glass is recommended for its safety and durability.
Framing Options: Decide on the type of framing for the glass doors. Options include simple wood frames, decorative moldings, or metal frames. The choice will depend on your desired aesthetic and budget.

Step 2: Preparing the Cabinet

Once you have assessed your cabinet and chosen the appropriate materials, you can begin preparing for the installation. This involves:

Removing Existing Doors: Carefully remove the existing cabinet doors, noting the hinge placements and any pre-drilled holes.
Measuring and Cutting: Measure the interior dimensions of the cabinet opening and cut the glass panels to fit, leaving a small gap (around 1/8 inch) for expansion and to facilitate smooth sliding.
Frame Preparation: If using a wooden frame, cut and assemble the frame components according to the design. Ensure that the frame is level and square before securing it.
Preparing for Hinge Installation: Mark and drill pilot holes for the hinges on the cabinet sides and the frame. Use a drill bit slightly smaller than the hinge screw size.

Step 3: Installing the Glass Doors and Framing

With the cabinet prepared, you can proceed with installing the glass doors and framing:

Hinge Installation: Attach the hinges to the cabinet side and the frame. Use a drill and appropriate screws to secure them firmly.
Glass Panel Installation: Carefully insert the glass panels into the frame, ensuring a snug fit. Use glazing points, shims, or other suitable materials to ensure the glass is secure and flush with the frame.
Securing the Frame: If using a wooden frame, secure it to the cabinet by using screws or glue.
Installing the Locking Mechanism: Select a suitable locking mechanism, such as a magnetic latch or a key-operated lock. Install the locking mechanism onto the frame and ensure it operates smoothly.

Step 4: Finishing Touches and Enhancements

After completing the installation, you can add finishing touches and enhancements to complete the project:

Paint or Stain: Apply paint or stain to the frame to match the cabinet's finish.
Hardware: Install decorative hardware, such as door handles, pull knobs, or hinges, to complement the glass doors and enhance the overall aesthetic.
Internal Lighting: Consider adding internal lighting to illuminate the collection, enhancing visibility and creating a dramatic display effect. This can be achieved with LED strips or discreetly positioned lighting fixtures.
Interior Shelving: Installing interior shelving within the cabinet can help organize the firearms and create a more functional display.

Safety Considerations:

Tempered Glass: Always use tempered glass for maximum safety. It is designed to shatter into small, blunt pieces upon impact, minimizing injury risks.
Secure Installation: Ensure that the glass panels are securely installed within the frame and that the locking mechanism is functional.
Children's Safety: Keep children away from the gun cabinet and store keys in a safe place.
Firearm Safety: Always prioritize firearm safety by ensuring all firearms are unloaded, secured with trigger locks, and stored separately from ammunition.

Conclusion:

Adding glass doors to your DIY wooden gun cabinet is a rewarding project that enhances functionality and aesthetics. By carefully following these steps, you can transform your cabinet into a secure and stylish display for your treasured firearms. Remember to prioritize safety throughout the project and to store your firearms responsibly. With proper planning and execution, you can create a beautiful and functional gun cabinet that showcases your collection while safeguarding your family and your property.

How to build a handmade gun cabinet with lockable sliding doors

Posted by Alton with No comments
How to build a handmade gun cabinet with lockable sliding doors


Introduction

Gun ownership comes with significant responsibility, including the safe storage of firearms. While commercially available gun cabinets provide convenience, building a handmade cabinet allows for customized design, size, and security features. This article will guide you through the process of constructing a high-quality gun cabinet with lockable sliding doors, ensuring the secure storage of your firearms.

Materials and Tools

Before embarking on this project, gather the necessary materials and tools:

Materials:

Cabinet Carcass:
Lumber: Choose durable, hard-wearing lumber like oak, maple, or cherry for the cabinet frame and shelves. Ensure the wood is properly seasoned and free of knots.
Plywood: Use 3/4" or 1/2" plywood for the cabinet sides, back, and doors. Consider marine-grade plywood for increased moisture resistance.
Doors:
Sliding door hardware: Invest in heavy-duty sliding door hardware designed for the weight of your cabinet doors.
Door material: Use the same lumber and plywood as the cabinet carcass for the doors. Alternatively, solid wood panels or decorative materials like metal can be incorporated.
Lock and Hardware:
Lock: Choose a high-security lock with a key-operated mechanism or a combination lock, depending on your preference. Consider a lock with multiple deadbolts for enhanced security.
Hinges: Select strong, durable hinges designed for the weight of the doors.
Handles: Opt for sturdy handles that are comfortable to grip.
Fasteners: Use high-quality screws, bolts, and nails for assembling the cabinet and attaching hardware.
Finishing:
Primer: Apply a primer compatible with your chosen paint or stain.
Paint or stain: Choose a durable and long-lasting finish that complements your décor.
Polyurethane sealant: A polyurethane sealant protects the cabinet from moisture, scratches, and wear.

Tools:

Measuring Tape: Ensure accurate measurements for precise cuts.
Saw: A circular saw, table saw, or miter saw is essential for cutting the lumber and plywood.
Drill: A cordless drill with various bits for drilling pilot holes and attaching hardware.
Screwdriver: Use a variety of screwdrivers for different screw sizes.
Clamps: Securely hold pieces together during assembly.
Level: Ensure the cabinet is level during construction.
Sandpaper: Smooth out rough edges and surfaces.
Brush or roller: Apply primer, paint, and sealant evenly.

Construction Process

1. Design and Planning:

Size and Dimensions: Determine the desired dimensions of your cabinet based on the size of your firearms and the available space. Consider the height, width, and depth needed for convenient storage and accessibility.
Shelf Configuration: Plan the number and placement of shelves to accommodate various firearms and accessories.
Door Style: Decide on the type of sliding doors â€" single or double, and the desired appearance.
Security Features: Determine the level of security required. Consider options like multiple locks, heavy-duty hinges, and reinforced door frames.

2. Cabinet Carcass Construction:

Cut Lumber: Use the saw to cut the lumber for the cabinet frame and shelves according to your planned dimensions.
Assemble the Frame: Join the lumber pieces using wood glue and screws or dowels for a sturdy frame.
Install Shelves: Cut and attach the shelves to the frame, ensuring they are spaced appropriately for storage.
Attach Back Panel: Cut and attach the plywood back panel to the frame.

3. Door Construction:

Cut and Shape Doors: Cut the plywood or lumber for the doors to the desired size and shape.
Reinforce Doors: For added strength, consider reinforcing the doors with additional framing or wood strips.
Attach Hardware: Install sliding door hardware, ensuring it is securely mounted to the cabinet and doors.
Create Door Openings: Cut openings in the back panel for the sliding doors to slide smoothly.

4. Installing Locks and Hardware:

Mount Locks: Choose a secure location on the cabinet for the lock and mount it securely.
Attach Hinges: Install the hinges on the doors and the cabinet frame. Ensure the hinges are aligned and securely fastened.
Install Handles: Attach handles to the doors, considering their placement for easy access.

5. Finishing and Staining/Painting:

Sanding: Smooth out any rough edges or surfaces using sandpaper.
Priming: Apply a primer to the cabinet and doors for a smooth and even finish.
Painting or Staining: Apply the chosen paint or stain using a brush or roller. Ensure complete coverage and allow for proper drying time.
Sealant: Apply a polyurethane sealant to protect the finish from scratches and wear.

Safety Considerations:

Proper Ventilation: Ensure adequate ventilation during the construction and finishing process to prevent health risks from fumes.
Power Tool Safety: Always wear safety glasses and ear protection when using power tools.
Handling Sharp Objects: Be cautious when handling sharp tools and materials.
Fire Safety: Exercise caution when working with flammable materials, like wood glue or paint.

Conclusion:

Building a handmade gun cabinet with lockable sliding doors is a rewarding project that combines craftsmanship with practicality. By following these guidelines, you can create a secure and stylish storage solution for your firearms. Remember to prioritize safety throughout the construction process and choose high-quality materials and hardware to ensure the longevity and security of your cabinet. With meticulous planning and execution, you can build a gun cabinet that serves as a testament to your commitment to responsible gun ownership.

How to make a wooden clock that adds rustic charm

Posted by Alton with No comments
How to make a wooden clock that adds rustic charm


The allure of rustic charm lies in its unassuming simplicity, the raw beauty of natural materials, and the whispers of history it carries. A wooden clock, handcrafted with care and imbued with rustic elements, embodies these very qualities, transforming a functional timepiece into a statement of warmth and character. This guide delves into the art of crafting a rustic wooden clock, unveiling the process from design conception to final patina.

I. Embracing the Rustic Aesthetic

The essence of rustic charm lies in embracing imperfection, celebrating the natural beauty of wood, and incorporating elements that whisper of bygone eras. To achieve this, consider these key elements:

Wood Selection: Opt for naturally distressed woods like reclaimed barnwood, weathered pine, or rustic oak. Their imperfections, knots, and variations in grain create a unique visual narrative.
Natural Finishes: Avoid high-gloss varnishes that mask the wood's character. Embrace natural oils, waxes, or stains that enhance the wood's inherent beauty and allow its texture to shine through.
Distressed Elements: Introduce deliberate imperfections to enhance the rustic feel. This could involve chipping paint, sanding edges unevenly, or incorporating reclaimed metal parts with a touch of rust.
Rustic Hardware: Choose hardware that complements the rustic theme, such as antique-style clock hands, aged brass hinges, or salvaged gears.
Textured Surfaces: Incorporate elements that add tactile interest, like wood carvings, raised borders, or distressed metal accents.

II. Designing the Clock Face

The clock face is the focal point of your creation. Design it to complement your chosen rustic aesthetic:

Roman Numerals: Classic Roman numerals evoke a timeless charm, adding a touch of history and grandeur to the design.
Simple Arabic Numerals: For a more modern rustic feel, consider using simple Arabic numerals in a distressed font.
Unique Numbering: Explore alternative numbering systems, like using the names of months or seasons, or even creating your own symbolic representation of time.
Distressed Clock Face: Consider creating a distressed, aged look for the clock face itself, using techniques like sanding, distressing paint, or applying a natural patina.
Integrated Designs: For a cohesive look, incorporate elements from your wood selection into the clock face design. For instance, a piece of reclaimed barnwood with a natural hole could be incorporated into the clock's center.

III. Constructing the Clock Mechanism

The heart of your wooden clock lies in its mechanism. Choose a suitable movement based on your desired functionality and aesthetic:

Quartz Movements: For a silent and accurate timekeeping, opt for a quartz movement. These are readily available in various sizes and styles, making them suitable for various clock designs.
Mechanical Movements: For a more traditional, audible tick-tock, consider a mechanical movement. These offer a sense of nostalgia and can be a focal point of the design.
Custom Movements: For unique designs, explore specialized movements like grandfather clock movements or astronomical movements.

IV. Building the Clock Frame

The clock frame provides the platform for your design, and its construction should be carefully planned:

Frame Design: Consider the shape and size of your frame. Classic square or rectangular shapes are versatile, while unique shapes like ovals or octagons can create a more striking visual.
Joining Techniques: Opt for rustic joinery techniques like mortise and tenon, dovetails, or hand-cut joints for a more authentic feel.
Frame Thickness: The thickness of the frame depends on the size and weight of your clock. Thicker frames provide greater stability, while thinner frames offer a lighter aesthetic.
Frame Finishing: After assembling the frame, treat it with a natural finish that complements your chosen wood and desired aesthetic.

V. Assembling and Finishing

The final stage involves assembling all the elements and applying the finishing touches:

Attaching the Movement: Securely mount the clock movement to the back of the frame, ensuring it is level and centered.
Installing the Hands: Attach the clock hands to the movement shaft, ensuring they are aligned with the clock face.
Fixing the Clock Face: Carefully attach the clock face to the frame, using secure fasteners that complement the rustic theme.
Adding Accents: Incorporate any additional elements like carvings, metal accents, or distressed paint details to enhance the overall rustic aesthetic.
Applying a Final Finish: After assembling all elements, apply a final layer of natural finish like wood oil, wax, or a distressed paint to complete the look.

VI. Beyond the Basic:

For a truly unique and personalized creation, consider these advanced elements:

Integrated Lighting: Incorporate LED lighting to highlight the wood's texture and create a warm ambiance.
Custom Carvings: Employ carving techniques to create intricate patterns, decorative elements, or even custom designs that reflect your personal taste.
Mixed Media: Combine wood with other rustic materials like metal, leather, or fabric for a more intricate and layered design.

VII. Conclusion:

Crafting a rustic wooden clock is a rewarding journey, combining craftsmanship, creativity, and a love for natural materials. By embracing the principles of rustic design, incorporating unique elements, and meticulously assembling each component, you can create a timeless timepiece that exudes warmth, character, and a touch of the past. It becomes more than a clock; it becomes a conversation piece, a testament to your skills, and a cherished heirloom that will be enjoyed for generations to come.

DIY Birdhouse: How to Create One for Your Favorite Bird Species

Posted by Alton with No comments
DIY Birdhouse: How to Create One for Your Favorite Bird Species


Birdhouses, often referred to as nest boxes, are not merely decorative additions to your garden; they serve as vital shelters and breeding grounds for birds. Building a DIY birdhouse is an enjoyable and rewarding project, providing a tangible way to contribute to local biodiversity and attract fascinating avian residents to your backyard.

This comprehensive guide will equip you with the knowledge and practical steps to create a safe and inviting sanctuary for your chosen bird species.

1. Choosing Your Bird Species:

The first step is to determine which bird species you wish to attract. This is crucial as different species have unique nesting preferences, including entrance hole size, cavity depth, and overall dimensions.

a) Researching Your Feathered Tenants:

Familiarize yourself with the local bird species that might benefit from a birdhouse. Consult field guides, online resources, or local birdwatching organizations.

b) Considering Nest Box Dimensions:

Once you have identified your target bird, research their nesting requirements.

- House Wren: Requires a 1.25-inch entrance hole, a 6-inch depth, and a floor area of at least 4x4 inches.
- Bluebird: Needs a 1.5-inch entrance hole, a 7-inch depth, and a floor area of 5x5 inches.
- Chickadee: Prefers a 1.25-inch entrance hole, a 5-inch depth, and a floor area of 4x4 inches.
- Downy Woodpecker: Requires a 1.5-inch entrance hole, a 6-inch depth, and a floor area of 4x4 inches.

2. Gathering Materials and Tools:

The materials and tools needed for building a birdhouse are readily available.

a) Materials:

- Wood: Durable, untreated wood like cedar, redwood, or pine is ideal. Avoid using pressure-treated lumber as the chemicals can be harmful to birds.
- Screws: Use rust-resistant screws to assemble the birdhouse.
- Paint or Stain: Optional, but recommended to protect the wood and add a decorative touch. Choose non-toxic, bird-friendly paints or stains.
- Roofing Shingles or Felt Paper: To provide weatherproofing for the roof.
- Entrance Hole Drill Bit: Sized according to the bird species' requirements.

b) Tools:

- Saw: A hand saw or power saw for cutting wood.
- Drill: With a drill bit for creating the entrance hole and pilot holes for screws.
- Screwdriver: For securing screws.
- Measuring Tape: To ensure accurate dimensions.
- Pencil: For marking and sketching the birdhouse design.

3. Designing and Constructing Your Birdhouse:

a) Designing the Birdhouse:

- Basic Structure: Most birdhouses consist of a rectangular box with a roof and an entrance hole.
- Floor Area: The floor area should be large enough for the chosen bird to comfortably build a nest.
- Roof: The roof should overhang the sides to provide protection from the elements. Consider adding ventilation holes to the roof to prevent moisture build-up.
- Entrance Hole: The entrance hole should be placed on the side, ideally facing the east or southeast, to maximize morning sunlight.
- Landing Perch: Adding a small perch beneath the entrance hole can provide a convenient landing spot for the birds.

b) Constructing the Birdhouse:

1. Cut the Wood: Using your saw, carefully cut the wood pieces according to your design and measurements.
2. Assemble the Base: Join the bottom and side panels of the birdhouse using screws. Ensure the corners are square and secure.
3. Attach the Back and Front Panels: Secure the back and front panels to the base, creating a box-like structure.
4. Create the Roof: Cut two pieces of wood to form the roof. Make sure the roof overhangs the sides of the birdhouse for weather protection.
5. Attach the Roof: Secure the roof panels to the top of the birdhouse using screws or hinges.
6. Cut and Install the Entrance Hole: Using your drill and the appropriate size drill bit, carefully create the entrance hole.
7. Add a Perch (Optional): If desired, attach a small perch beneath the entrance hole.
8. Paint or Stain: Apply your chosen paint or stain to protect the wood and enhance its aesthetic appeal. Allow the paint or stain to dry completely before proceeding.
9. Final Touches: Consider adding a decorative element, such as a small birdhouse sign or a natural branch for the birds to perch on.

4. Placing and Maintaining Your Birdhouse:

a) Selecting the Right Location:

- Height: Place the birdhouse between 5 and 15 feet above the ground. This height discourages predators and allows for proper ventilation.
- Sunlight: Position the birdhouse in a location that receives adequate sunlight, ideally facing the east or southeast for maximum morning sun exposure.
- Safety: Choose a location that is safe from wind, rain, and extreme heat. Ensure that the birdhouse is securely mounted to prevent falling.
- Predator Protection: Consider placing the birdhouse in a location that is shielded from predators such as cats, snakes, or squirrels.

b) Maintaining the Birdhouse:

- Annual Cleaning: Clean the birdhouse in the late fall or early winter after the breeding season is over. Remove any nesting materials and disinfect the interior with a bleach solution.
- Regular Inspections: Periodically check for signs of damage or deterioration.
- Avoid Disturbance: Minimize disturbance to the birdhouse during the breeding season. Avoid handling the nest box or approaching too closely.

5. Enjoying Your Birdhouse and Its Feathered Residents:

Your DIY birdhouse will not only provide a haven for birds but also create a unique and rewarding connection with nature.

- Observing Bird Behavior: Enjoy watching your feathered friends build their nests, raise their young, and interact with their surroundings.
- Sharing Your Experience: Share your experience with others and encourage them to create their own birdhouses.
- Supporting Local Biodiversity: By providing nesting opportunities, you are contributing to the health and diversity of your local ecosystem.

Building a DIY birdhouse is a rewarding and fulfilling endeavor that allows you to actively contribute to the well-being of local bird populations. By carefully choosing a species, researching their nesting preferences, and creating a safe and welcoming environment, you can enjoy the beauty and wonder of birds in your backyard.