Sunday, February 2, 2025

Free Woodwork Project Ideas for Personalized Creations

Posted by Alton with No comments

Free Woodwork Project Ideas for Personalized Creations

The inherent beauty and versatility of wood make it an ideal medium for crafting personalized gifts and home décor. This article presents a diverse range of free woodworking project ideas, catering to various skill levels and preferences. From simple, beginner-friendly projects to more challenging endeavors for experienced woodworkers, these designs offer ample opportunity for creative expression and the creation of truly unique, handcrafted items.

Beginner-Friendly Projects: Cultivating Confidence and Skill

Embarking on your woodworking journey requires a foundation of fundamental skills and confidence. The following projects are designed to be accessible to beginners, providing a gentle introduction to the craft while allowing for personalized touches.

Simple Coasters: A Foundation of Functionality and Style

Crafting a set of personalized coasters is an excellent starting point. Choose a readily available hardwood like pine or poplar, and cut square or circular blanks to your desired size. Sanding is crucial for achieving a smooth finish. Consider adding a personalized touch through simple techniques such as burning initials or applying a decorative stain. The ease of this project allows for experimentation with different woods and finishes, fostering a sense of accomplishment.

Wooden Keychains: Miniature Masterpieces of Personalization

Small and manageable, wooden keychains offer a fantastic opportunity to practice your precision cutting and shaping skills. Use scraps of hardwood or softer woods like basswood, and create simple shapes, such as hearts, animals, or even initials. Drill a hole for the keychain ring, sand thoroughly, and finish with a sealant or varnish. Consider using contrasting wood inlays for a more advanced design. The resulting keychain serves as both a functional item and a miniature testament to your burgeoning woodworking skills.

Personalized Picture Frames: Framing Memories with Craftsmanship

A picture frame represents more than just a functional object; it's a vessel for cherished memories. Constructing a simple frame from readily available lumber is an accessible project for beginners. Precise measuring and cutting are key to ensuring a perfect fit for your chosen photograph. After assembly, sanding and finishing provide the opportunity to personalize the frame with stains, paints, or even decorative wood burning. Consider adding a small plaque or engraved inscription for an added touch of personalization.

Intermediate Projects: Refining Techniques and Expanding Creativity

Once you've mastered the basics, you can venture into more complex projects that challenge your skills and creativity. The following projects require more precision and attention to detail, but the resulting pieces are considerably more rewarding.

Small Wooden Boxes: Combining Form and Function

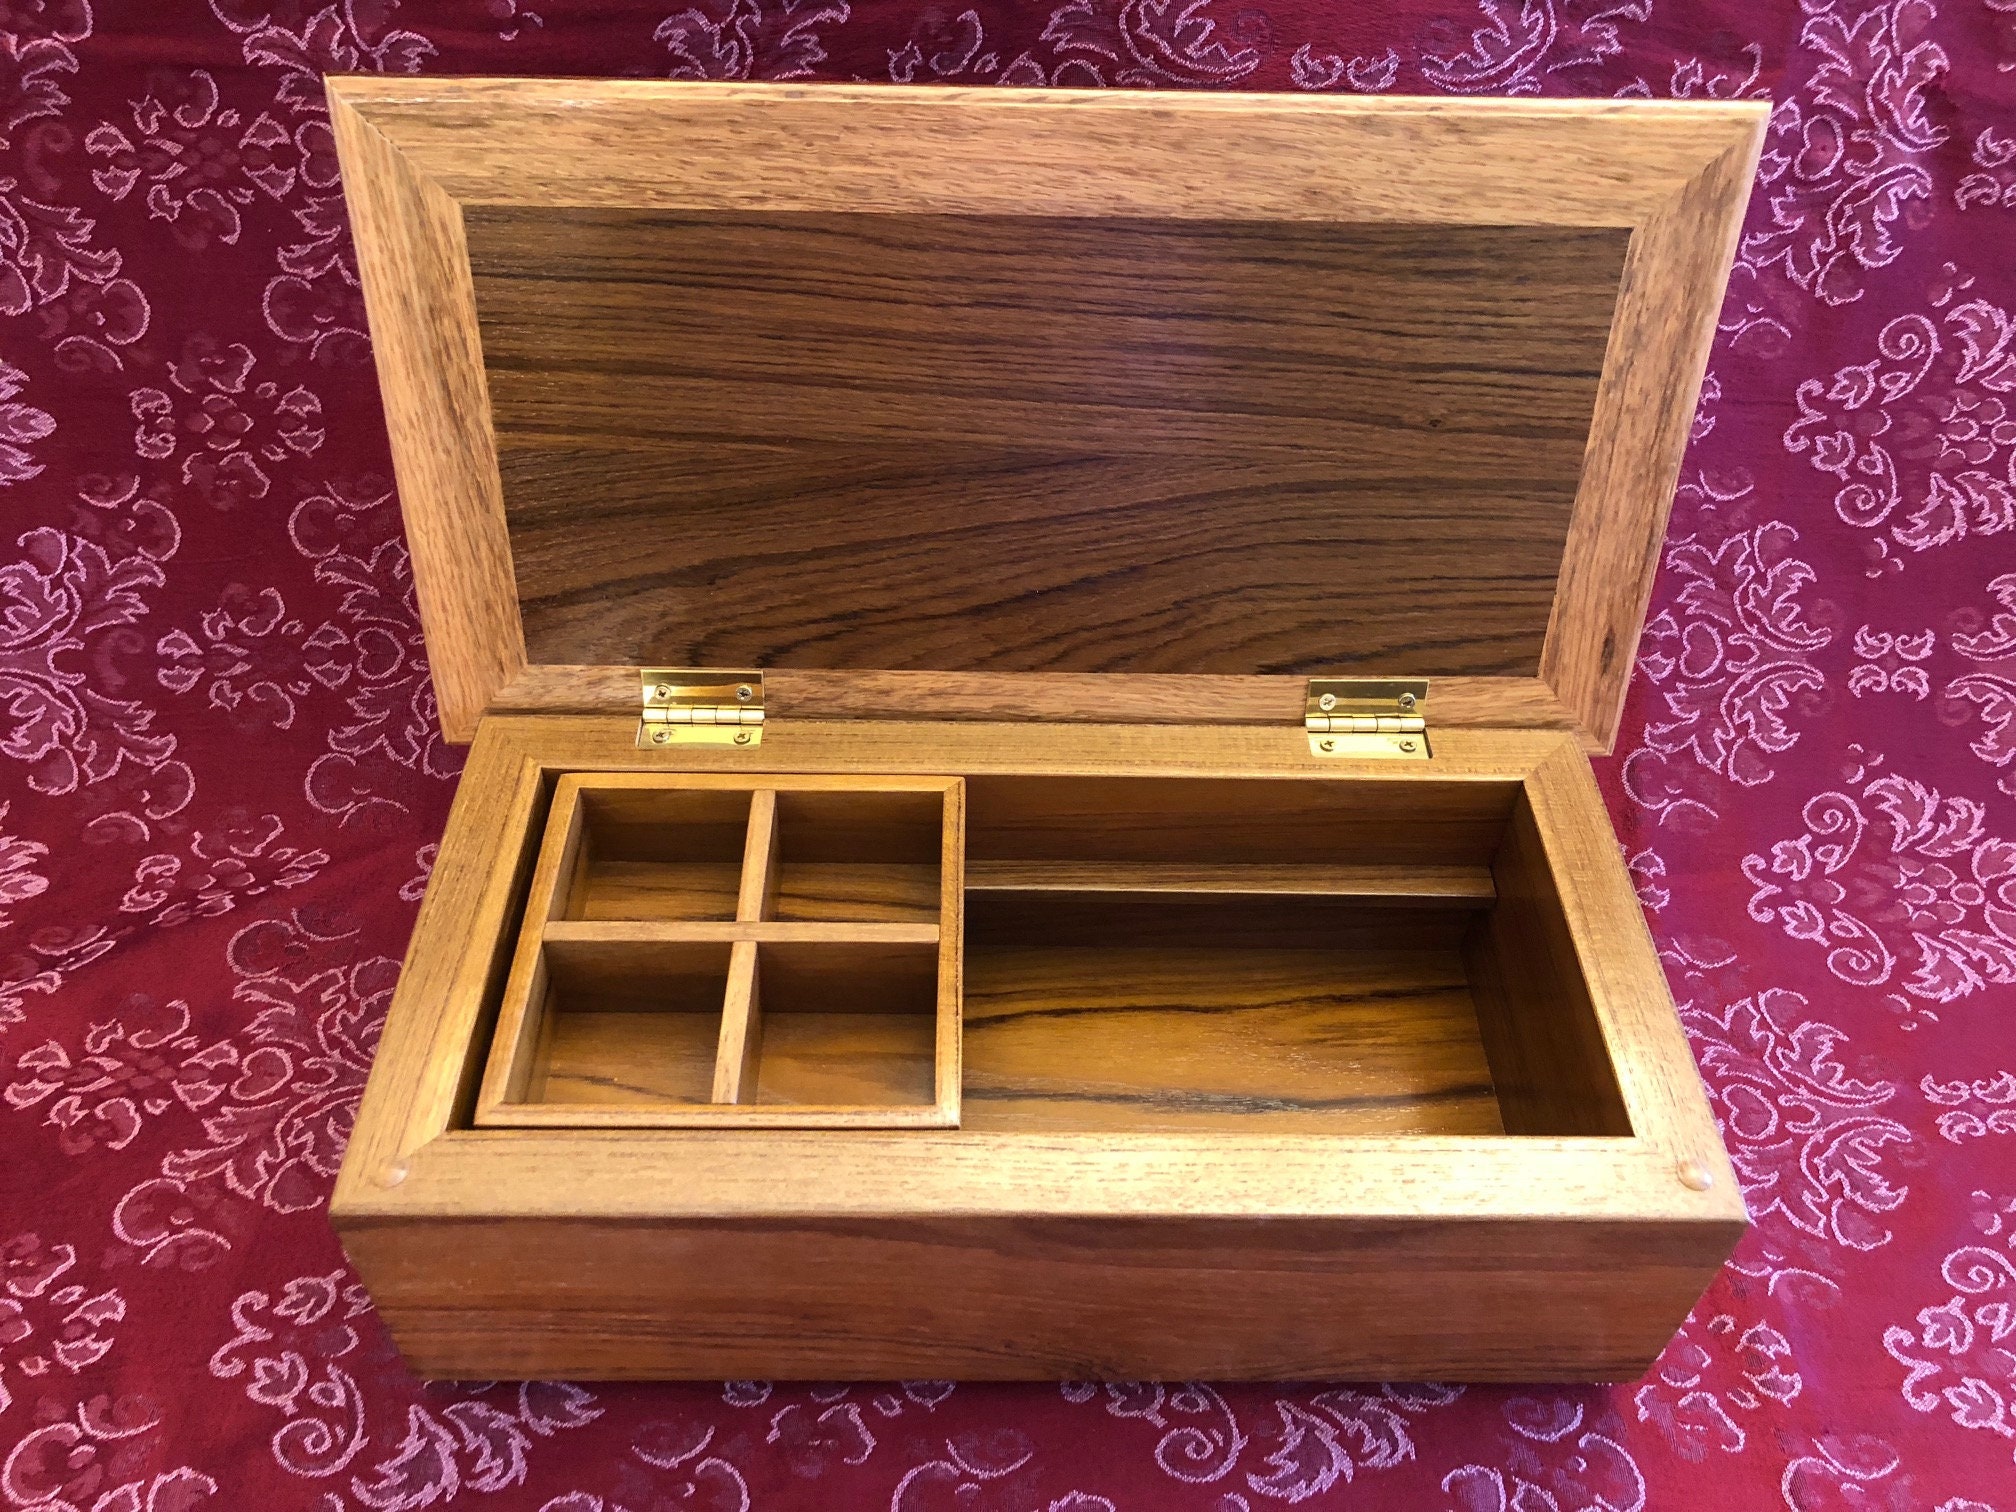
Constructing a small wooden box, such as a jewelry box or a trinket box, presents an excellent opportunity to develop your joinery skills. Simple techniques like rabbet joints or miter joints can be employed to achieve a sturdy and aesthetically pleasing design. The use of contrasting woods or decorative inlays elevates the project, turning it into a beautiful and personalized gift. Precise measuring, accurate cutting, and careful assembly are crucial for a successful outcome.

Cutting Boards: Functional Art for the Kitchen

Crafting a custom cutting board is both practical and artistically fulfilling. Hardwoods like maple, cherry, or walnut are ideal choices due to their durability and beautiful grain patterns. The challenge lies in achieving a perfectly smooth and food-safe surface. Careful sanding, multiple coats of food-safe oil, and attention to detail are essential. Consider incorporating contrasting wood strips or creating a unique shape for added personalization.

Shelves: Organization and Style in One Project

Building floating shelves provides a practical solution for storage while also serving as a decorative element in any room. The project requires precise measurements and a secure method of attachment to the wall. Choose a wood that complements your existing décor, and consider adding decorative elements like curved edges or unique bracing for added personalization. This project demands careful planning and execution, but the end result is a functional and stylish addition to any space.

Advanced Projects: Embracing Complexity and Mastering the Craft

For experienced woodworkers seeking challenging projects that push their skills to the limit, the following ideas provide ample opportunity for creativity and self-expression.

Detailed Wooden Toys: Combining Skill and Imagination

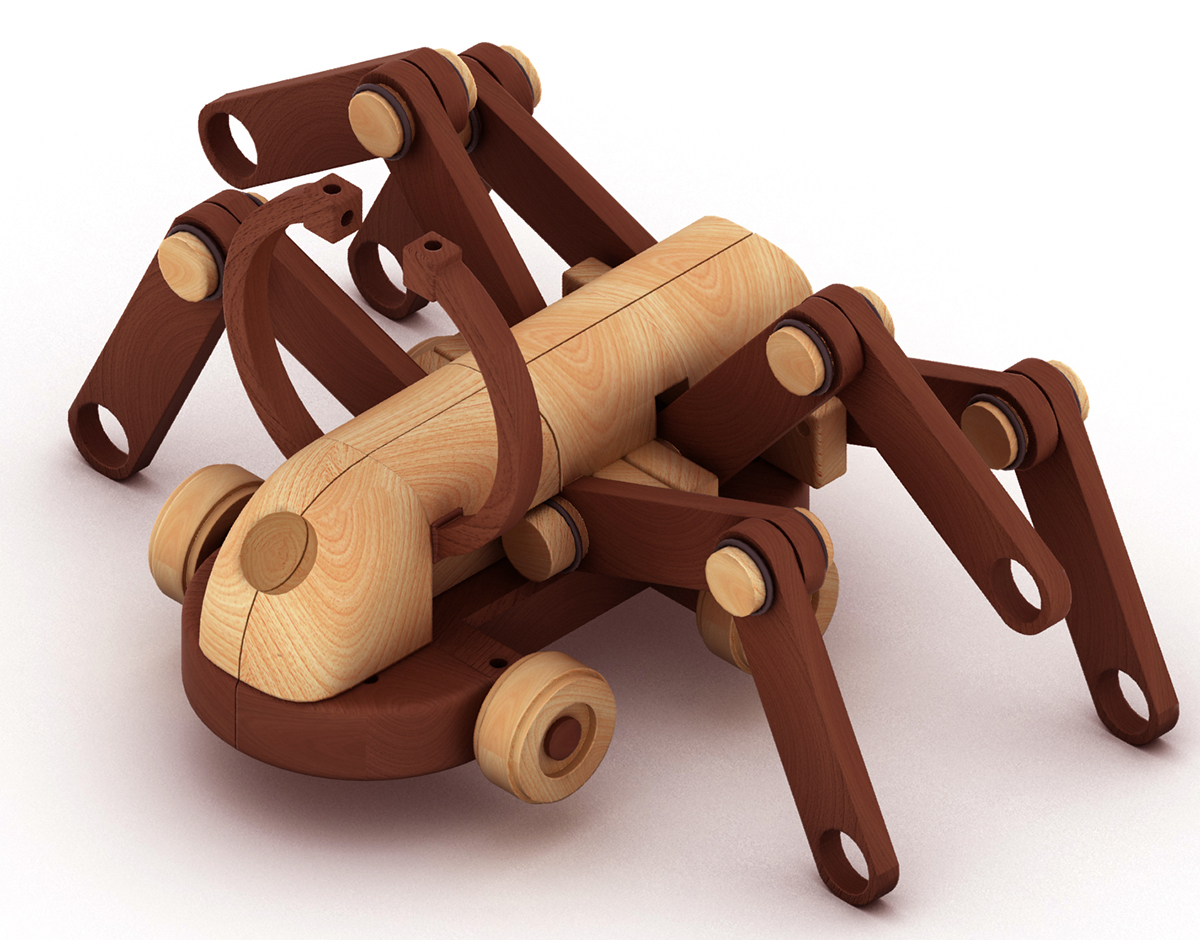
Constructing intricate wooden toys, such as rocking horses or detailed toy cars, requires a high level of skill and precision. These projects demand mastery of a range of woodworking techniques, including carving, shaping, and assembly. The use of various joinery techniques and potentially even the incorporation of moving parts adds to the complexity. The resulting toys are not just playthings but also testaments to the woodworker's skill and dedication.

Custom Furniture: Creating Lasting Heirlooms

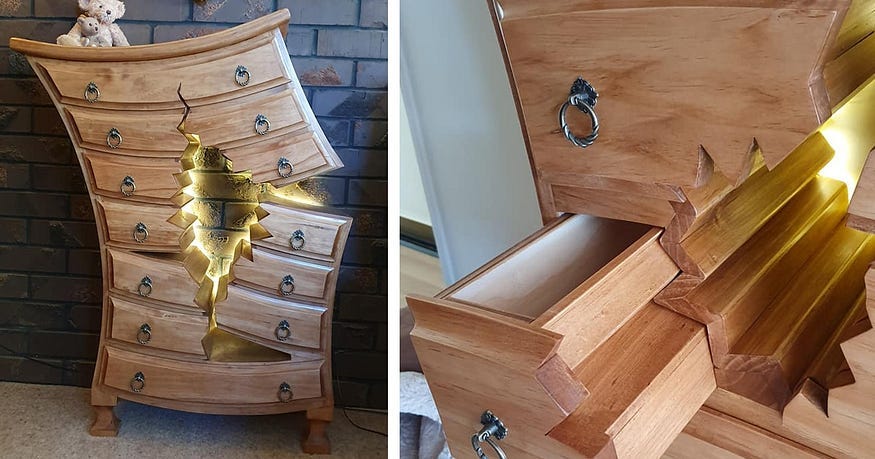
Undertaking the creation of a piece of custom furniture, such as a small table or a chair, is a significant project that requires extensive planning and woodworking expertise. Careful design, precise measurements, and the selection of appropriate joinery techniques are paramount. The personalized nature of this project allows for complete control over the design, materials, and finish, potentially resulting in a cherished family heirloom. This undertaking represents a significant accomplishment in woodworking.

Intricate Wooden Puzzles: A Test of Precision and Design

Designing and crafting a complex wooden puzzle demands both creative vision and exceptional precision. The intricate cuts and shapes require careful planning and the use of specialized tools. Consider incorporating themes or personalized elements within the puzzle's design, transforming it from a simple game into a unique and memorable keepsake. The final product showcases advanced woodworking skills and an understanding of design principles.

Note: Always prioritize safety when undertaking any woodworking project. Ensure you have the appropriate tools, protective gear, and a safe workspace. Refer to detailed instructions and tutorials for each project to avoid mistakes and ensure successful completion. The journey of learning and creating is an ongoing process, and each project offers valuable lessons and the satisfaction of crafting something truly unique and personalized.

Saturday, February 1, 2025

Kids Woodworking Plans for Fun Crafting Projects

Posted by Alton with No comments

Ignite Your Child's Creativity: Fun Kids' Woodworking Projects

Unleash your child's inner craftsman with these exciting woodworking projects! Forget passive screen time – let's get hands-on and build something amazing. These plans cater to various skill levels, ensuring both beginners and more experienced young woodworkers find a challenge they can conquer and enjoy. Prepare for sawdust, smiles, and a whole lot of pride as you embark on this creative journey together.

Simple & Satisfying Starter Projects

For younger children or those new to woodworking, starting with smaller, simpler projects builds confidence and fosters a love for the craft. These projects emphasize basic skills like sawing, gluing, and sanding, laying a solid foundation for more complex endeavors later on.

Miniature Wooden Animals

Cut out simple animal shapes from pre-cut wood pieces (available at craft stores). Let your child decorate these using non-toxic paints, markers, or even colored pencils. They can add googly eyes and glue on small details like felt ears or pipe cleaner tails. This project emphasizes creativity and fine motor skill development. Remember to supervise closely during cutting and painting.

Colorful Wooden Coasters

Use pre-cut squares of wood (or cut your own with adult supervision) as the base for personalized coasters. Let your child choose their favorite colors and decorate them with paint, stickers, or decoupage. This is a great way to introduce the concept of measuring and cutting to scale while creating functional, everyday items.

Intermediate Projects: Stepping Up the Challenge

Once your child has mastered the basics, it's time to tackle more intricate projects that require increased precision and planning. These projects encourage problem-solving and develop a deeper understanding of woodworking techniques.

A Birdhouse for the Backyard

Building a birdhouse provides a rewarding challenge. Download or create a simple birdhouse plan online. This project introduces the use of nails, screws (with adult supervision), and possibly even a small saw. Ensure proper safety measures are taken throughout the construction process. Painting the finished birdhouse adds a personal touch and invites children to explore their artistic side.

A Simple Wooden Toy Car

Constructing a toy car from wood teaches crucial skills, including accurate measuring, cutting, and assembling. Start with a simple design – four wheels, a body, and maybe even a small steering wheel. Utilize glue, screws, or nails to hold the pieces together. Let your child decide on the paint scheme and add personalized touches.

Advanced Projects: For Aspiring Woodworkers

These projects require more advanced skills and planning, offering a significant sense of accomplishment upon completion. These are best suited for older children with some prior woodworking experience and with close adult supervision at all times.

A Small Wooden Chest

Designing and building a small wooden chest, using detailed plans, introduces more advanced joinery techniques and the use of hinges and latches. This project demands careful measurement and precise cutting. Consider using pre-cut joinery pieces for beginners to simplify the process.

A Unique Wooden Puzzle

Creating a personalized wooden puzzle lets your child design the shape and intricacy. This project combines creativity with technical skill and encourages problem-solving. Start with simple shapes before moving onto more complex designs. The finished product offers hours of engaging play.

Remember, safety should always be the top priority. Always supervise children closely, ensure they use appropriate safety equipment (like safety glasses), and teach them proper tool handling techniques. With patience, guidance, and a touch of creativity, these woodworking projects will create lasting memories and a profound appreciation for the craft.

Woodworking Projects for Children’s Creativity and Fun

Posted by Alton with No comments

Woodworking Projects for Children's Creativity and Fun

Engaging children in woodworking projects offers a unique blend of creativity, problem-solving, and hands-on learning. It fosters a sense of accomplishment and provides a tangible outcome that children can cherish and be proud of. However, safety must always remain the paramount concern. Adult supervision is crucial throughout the entire process, from project selection to tool usage and cleanup. This article outlines several age-appropriate woodworking projects, emphasizing safety precautions and the pedagogical benefits of this enriching activity.

Safety First: Establishing a Secure Woodworking Environment

Before embarking on any woodworking project with children, establishing a safe and organized workspace is paramount. This involves several key considerations:

Appropriate Tools and Equipment

For younger children (under 10), hand tools should be the primary focus. Avoid power tools entirely. Suitable hand tools include blunt-ended woodworking chisels, lightweight hammers (consider rubber mallets for increased safety), and child-safe saws with rounded teeth. Ensure all tools are in good working order and free from any sharp edges or defects. Always inspect tools before each use.

Protective Gear

Safety glasses or goggles should be worn by all participants, regardless of age. This protects eyes from flying debris. Children should also wear work gloves to protect their hands from splinters and potential injuries. For projects involving sanding, a dust mask is recommended to prevent inhalation of wood particles.

Workspace Organization

The workspace should be well-lit, clutter-free, and spacious enough to allow for comfortable movement. All tools and materials should be neatly arranged and readily accessible. A designated area for scraps and waste should also be provided. Keep electrical cords out of reach to prevent tripping hazards.

Adult Supervision

Constant adult supervision is non-negotiable. An adult should be present at all times to guide the children, ensure safe tool usage, and intervene if necessary. The adult's role is not just to supervise, but also to participate and guide the process, encouraging problem-solving and creative expression.

Age-Appropriate Woodworking Projects

The complexity of the project should be tailored to the child's age and skill level. Start with simpler projects and gradually progress to more challenging ones as their abilities develop.

Projects for Younger Children (5-7 years old):

At this age, the focus should be on simple projects that develop fine motor skills and hand-eye coordination. Projects should involve minimal tool usage and focus on gluing, assembling pre-cut pieces, and decorating.

  • Wooden Puzzles: Use pre-cut shapes or simple designs, allowing children to assemble the pieces. This enhances problem-solving and spatial reasoning.
  • Decorated Picture Frames: Provide pre-cut frames and let children decorate them with paint, stickers, or collage materials. This fosters creativity and self-expression.
  • Simple Birdhouses (pre-assembled): Using pre-cut and pre-drilled birdhouse kits, children can focus on assembling and decorating. This introduces basic construction concepts.
  • Wooden Spoons: Decorate plain wooden spoons with paints, markers, or decoupage. This is a fun and creative way to personalize everyday objects.

Projects for Older Children (8-12 years old):

Older children can handle slightly more challenging projects involving basic woodworking techniques. Introduce them to simple hand tools under strict supervision.

  • Simple Shelves: Using pre-cut wood pieces and screws, children can learn to assemble simple shelves. This introduces basic joinery techniques.
  • Miniature Furniture: Constructing small-scale furniture like chairs or tables helps develop spatial awareness and construction skills. Use simple designs and pre-cut pieces.
  • Birdhouses (from scratch): With adult assistance, children can learn to cut, shape, and assemble a simple birdhouse from scratch. This is a more advanced project requiring careful guidance.
  • Wooden Toys: Constructing simple toys like cars or trucks introduces more complex woodworking techniques like drilling (with adult supervision) and sanding.
  • Coat Hangers: Constructing a simple wooden coat hanger allows for creativity in design and sanding, strengthening fine motor skills.

The Educational Benefits of Woodworking for Children

Woodworking offers a multitude of educational benefits beyond the simple creation of a tangible object. It fosters:

  • Fine Motor Skill Development: Handling tools and manipulating small pieces improves hand-eye coordination and dexterity.
  • Problem-Solving Skills: Children learn to plan, measure, and troubleshoot problems as they work through the project.
  • Spatial Reasoning: Understanding how different pieces fit together enhances spatial awareness and 3D visualization.
  • Creativity and Self-Expression: Children can personalize their creations through design choices, colors, and decorations.
  • Patience and Perseverance: Woodworking requires patience and persistence to complete a project successfully.
  • STEM Skills: Woodworking incorporates elements of science, technology, engineering, and mathematics.
  • Self-Esteem and Accomplishment: Completing a project instills a sense of pride and accomplishment.

In conclusion, woodworking provides a valuable and engaging activity for children, fostering creativity, problem-solving, and a multitude of other essential skills. With careful planning, adult supervision, and age-appropriate projects, woodworking can be a rewarding and enriching experience for children of all ages. Remember that safety should always be prioritized, ensuring a fun and educational experience.

Sunday, January 26, 2025

Sustainable DIY wooden furniture using reclaimed wood

Posted by Alton with No comments

Giving Reclaimed Wood Furniture a Second Life: Your Sustainable DIY Adventure

Hey there, fellow DIY enthusiasts and eco-conscious crafters! Let's talk about something I'm seriously passionate about: building beautiful, functional furniture using reclaimed wood. It's a fantastic way to create unique pieces for your home while also giving old wood a second chance at life. Forget those mass-produced, cheaply made things â€" let's get our hands dirty and build something with character, sustainability, and a whole lot of heart.

Why Reclaimed Wood? The Eco-Friendly Choice

Before we dive into the fun part (building!), let's chat about why reclaimed wood is such a fantastic choice. It's basically the ultimate sustainable material. Think about it: you're rescuing wood that would otherwise end up in a landfill, reducing waste and the environmental impact of deforestation. That's a pretty big win for the planet!

Plus, reclaimed wood often boasts incredible character. Those weathered textures, unique knots, and variations in color? They're not flaws; they're what give each piece its own distinct personality. You won't find this kind of charm in your average home improvement store.

Environmental Benefits Beyond the Obvious

The environmental benefits go beyond just reducing landfill waste. Manufacturing new wood products is energy-intensive. Using reclaimed wood significantly reduces the energy consumption associated with logging, processing, and transporting new lumber. It’s a win-win for your wallet and the environment!

Sourcing Your Reclaimed Wood: Where to Begin

Now, the hunt begins! Finding reclaimed wood is half the fun (and a bit of an adventure!). Here are a few places to start your search:

  • Demolition Sites: Keep an eye out for buildings being demolished in your area. You might be able to snag some beautiful wood before it gets tossed.
  • Salvage Yards: These places are treasure troves of reclaimed materials, including wood. Expect to find a wide variety of sizes, types, and conditions.
  • Online Marketplaces: Websites like Craigslist, Facebook Marketplace, and even eBay can be great places to find people selling reclaimed wood.
  • Local Recycling Centers: Some recycling centers may have wood available for reuse. It's always worth giving them a call.
  • Friends and Family: Don’t underestimate the power of your network! Ask around â€" you might be surprised what people have lying around in their garages or sheds.

Remember to always ask permission before taking any wood from a site, and be prepared to do some cleaning and prep work once you've found your treasures.

Preparing Your Reclaimed Wood: Cleaning and Conditioning

Once you’ve got your hands on some glorious reclaimed wood, it's time for a bit of pre-project pampering. This step is crucial for ensuring your furniture looks amazing and lasts for years to come.

Cleaning the Wood

Depending on where the wood came from, it might be dirty, dusty, or even covered in old paint or varnish. A good scrubbing with a stiff brush and some warm, soapy water is a great start. For stubborn grime, you might need a pressure washer (carefully!), or even a wire brush for tougher bits of paint or debris. Let it dry thoroughly afterward.

Checking for Pests

This is super important! Inspect your wood carefully for signs of pests like termites or woodworm. If you find any infestations, you'll need to take appropriate action (treating with insecticide, or possibly discarding the affected pieces) before you start your project. Preventing pest problems is key to your furniture’s longevity.

Inspecting for Damage

Take a close look for cracks, splits, or rot. You might need to fill in some cracks with wood filler or replace severely damaged sections. This is all part of the process and allows you to create truly unique and characterful pieces.

Designing and Building Your Reclaimed Wood Furniture

Now for the exciting part: designing and building! This is where your creativity can really shine. The sky's the limit, but some popular and relatively straightforward projects for beginners include:

  • Coffee Table: A simple but elegant piece that’s great for showcasing the beauty of the reclaimed wood.
  • Shelves: Easy to customize to your space and storage needs.
  • Side Table: A smaller project, perfect for honing your skills.
  • Headboard: Add a rustic charm to your bedroom.

Remember to plan your design carefully, considering the dimensions of your reclaimed wood pieces. Sketch out your ideas, gather your tools (saw, drill, sandpaper, etc.), and take your time. Don’t rush the process â€" slow and steady wins the race (and a beautifully crafted piece of furniture!).

Finishing Touches: Protecting Your Creation

Once your furniture is assembled, it's time to add those finishing touches. A good sealant or finish will protect your reclaimed wood from moisture, pests, and wear and tear, ensuring it lasts for many years to come. You have many choices, from natural oils to paint, stains, and more. Consider the look you’re going for and choose accordingly. Apply the finish according to the manufacturer's instructions.

Commonly Asked Questions

Q: Is reclaimed wood expensive?

A: It can vary greatly depending on the type of wood, its condition, and where you source it. Sometimes you can find it very affordably, even for free! It’s definitely worth searching around.

Q: What kind of tools do I need?

A: The specific tools will depend on your project, but basic woodworking tools like a saw, drill, sandpaper, measuring tape, and clamps are a good starting point.

Q: How do I deal with old nails or screws in the wood?

A: Carefully remove any nails or screws using a hammer and claw or a screwdriver. If they’re difficult to remove, you can sometimes leave them in place, just be aware of them as you work.

Q: How do I make sure my finished furniture is safe?

A: Always use appropriate safety gear, such as safety glasses and dust masks, when working with wood. Ensure your project is structurally sound before use and follow the instructions for any finishes or sealants you use.

Q: Can I use reclaimed wood for outdoor furniture?

A: Yes, but you'll need to choose a wood species that's naturally resistant to rot and decay and use a high-quality outdoor-rated sealant to protect it from the elements.

So, there you have it! Building sustainable, reclaimed wood furniture is a rewarding experience. It combines creativity, sustainability, and a whole lot of personal satisfaction. Happy crafting!

Saturday, January 25, 2025

Woodworking Plans for Personalized Wooden Wall Signs

Posted by Alton with No comments

Crafting Custom Wooden Wall Signs: A Beginner's Guide

Hey there, fellow crafters! So you're thinking about making your own personalized wooden wall signs? Awesome! It's a super rewarding project, and honestly, way easier than you might think. This guide will walk you through everything, from picking the perfect wood to hanging your masterpiece. Let's get started!

Choosing Your Wood and Tools

First things first: the wood! This is where you get to unleash your creativity. You can use pretty much any type of wood, but some are easier to work with than others. For beginners, I’d recommend something like pine or basswood. They're relatively soft, easy to cut and sand, and readily available at most home improvement stores. If you're feeling adventurous, you could try something harder like oak or maple, but be prepared for a bit more of a challenge (and maybe some sore muscles!).

Wood Selection Considerations:

  • Thickness: Aim for something between ½ inch and ¾ inch thick. Too thin, and it might bend; too thick, and it'll be harder to work with.
  • Type: Pine is budget-friendly and forgiving. Hardwoods like oak offer durability and a richer look but require more skill.
  • Finish: Consider whether you want a stained, painted, or natural wood finish. This will influence your wood choice â€" a lighter wood will show off a stain better, while a darker wood might be better suited to paint.

Now, let's talk tools. You won't need a full woodworking shop to make a sign; a basic set will do just fine. Here's what you'll probably need:

Essential Tools:

  • Measuring tape and pencil: For accurate marking.
  • Jigsaw or hand saw: To cut the wood to your desired shape and size. A jigsaw is generally easier for intricate shapes.
  • Sandpaper (various grits): To smooth out the edges and surfaces. Start with a coarser grit (like 80) and work your way up to a finer grit (like 220) for a super smooth finish.
  • Wood glue: If you're adding any embellishments.
  • Clamps: To hold pieces together while the glue dries.
  • Drill and drill bits: If you’re adding hanging hardware.
  • Stain or paint (and brushes): To add color and finish.
  • Optional: Router, wood burner, stencils, etc. These add extra design possibilities, but aren't strictly necessary for a basic sign.

Designing Your Personalized Sign

This is where the fun really begins! What kind of message do you want to convey? What style are you going for? Do you want a simple, minimalist design, or something more elaborate? Consider your overall home decor when choosing a style. Here are some ideas to get your creative juices flowing:

Design Ideas:

  • Family names: A classic and timeless choice.
  • Inspirational quotes: Add a touch of motivation to your space.
  • Personalized messages: Create a unique sign for a special occasion or person.
  • Hobby-related designs: Showcase your passions, whether it's gardening, fishing, or baking.
  • Geometric patterns: Add a modern and stylish touch.
  • Silhouettes: Create a unique and artistic look.

Once you've got a design in mind, sketch it out on paper. This will help you visualize the final product and plan your cuts and lettering. Consider the size and proportions of your design in relation to the wood you've chosen.

Creating Your Masterpiece

Now it's time to bring your design to life! Carefully transfer your design onto your chosen wood using a pencil. Take your time with this stepâ€"accurate markings are crucial for a professional-looking finish. If you're using a stencil, secure it firmly to prevent any slippage.

Cut out your design using your jigsaw or hand saw. Remember to work slowly and carefully, especially with intricate shapes. Once you've cut everything out, start sanding! Smooth out all the edges and surfaces, paying close attention to any areas that might be rough or splintery. Remember to use different grits of sandpaper to achieve a perfectly smooth finish.

Next, it's time to add your finishing touches! This is where you apply your stain or paint, following the manufacturer's instructions carefully. Let it dry completely before applying any additional coats. You can also add other embellishments at this stage â€" consider adding some texture with a wood burner or even some decorative wood pieces.

Finally, add hanging hardware to the back of your sign. Use a drill to create pilot holes to prevent splitting, and then screw in your preferred hanging mechanism. You could use a sawtooth hanger, a keyhole hanger, or even some simple wire.

Finishing Touches and Hanging

Once your sign is completely dry, add any final embellishments you desire. This might involve adding a protective sealant to make the piece more durable. Consider applying a clear coat to enhance the color and protect it from damage. This is optional but recommended for longevity.

Finally, find the perfect spot on your wall to hang your new creation! Use a level to ensure it's straight, and admire your handiwork. You've successfully crafted a personalized wooden wall sign. Congratulations!

Frequently Asked Questions

Q: What's the best type of wood for beginners?

A: Pine or basswood are great options for beginners due to their softness and ease of cutting and sanding.

Q: Do I need expensive tools?

A: No! A basic jigsaw, sandpaper, and some paint or stain are enough to get started. You can always upgrade your tools as you become more experienced.

Q: How do I avoid splintering when cutting the wood?

A: Go slowly and carefully when cutting, use a sharp blade, and always sand after cutting.

Q: What kind of finish should I use?

A: This depends on your preference and the type of wood. Polyurethane is a popular choice for durability, while other options like wax or oil offer different looks and levels of protection.

Q: How can I make my sign more durable?

A: Apply a few coats of sealant after painting or staining to protect your sign from moisture and wear.

Happy crafting! I hope this guide has helped you create your own amazing personalized wooden wall sign. Don't hesitate to share your creations with me â€" I'd love to see them!

Wednesday, November 20, 2024

Wooden Toy Designs That Will Delight Parents and Kids Alike

Posted by Alton with No comments
Wooden Toy Designs That Will Delight Parents and Kids Alike

Wooden Toy Designs That Will Delight Parents and Kids Alike

In a world dominated by plastic and screens, wooden toys stand out as a beacon of natural beauty and timeless appeal. Their tactile textures, classic designs, and enduring quality offer a refreshing alternative to the fleeting fads of modern playthings. But beyond their aesthetics, wooden toys possess a unique magic that sparks imagination, fosters creativity, and cultivates a deep connection between children and the natural world. If you're looking for toys that will inspire your child's growth and bring joy to your family for generations to come, look no further than the enchanting world of wooden toy designs.

The Timeless Appeal of Wooden Toys

Wooden toys hold a special place in our hearts, evoking memories of childhood and the simple pleasures of creative play. Their classic designs have stood the test of time, transcending trends and technological advancements. From building blocks to rocking horses, these toys have a universal appeal that resonates with children of all ages and backgrounds.

Durable and Safe

Unlike their plastic counterparts, wooden toys are built to last. They can withstand the rigors of imaginative play and are often passed down through generations, becoming treasured family heirlooms. Their natural materials are free from harmful chemicals and toxins, ensuring a safe and healthy play environment for your little ones.

Fostering Imagination and Creativity

Wooden toys encourage open-ended play, allowing children to use their imaginations to create their own stories and worlds. Unlike toys with specific functions, wooden toys provide a blank canvas for creativity, prompting children to think outside the box and develop their problem-solving skills.

Sensory Exploration and Tactile Learning

The smooth surfaces and intricate details of wooden toys offer a unique sensory experience. Children can explore textures, shapes, and colors, developing their fine motor skills and spatial awareness. The natural warmth and weight of wood provide a comforting and grounding presence, enhancing the play experience.

Inspiring Wooden Toy Designs

The world of wooden toys is brimming with innovative and imaginative designs that cater to diverse interests and developmental stages. From traditional building blocks to intricate dollhouses, here are a few inspiring examples that capture the essence of playful creativity:

Stacking Blocks and Building Sets

Classic stacking blocks offer endless possibilities for building, creating, and problem-solving. Choose from simple geometric shapes or more intricate designs, such as animal figures or alphabet blocks. Stacking blocks help develop fine motor skills, hand-eye coordination, and spatial reasoning.

Wooden Puzzles

Puzzles are a fun and engaging way for children to develop problem-solving skills, spatial reasoning, and fine motor skills. Choose from simple jigsaw puzzles for toddlers to more challenging designs for older children. Wooden puzzles are also a great way to introduce concepts like shapes, colors, and animals.

Wooden Dolls and Playsets

Wooden dolls and playsets inspire imaginative role-playing and storytelling. Choose from traditional dolls, miniature furniture sets, or elaborate dollhouses. These toys encourage children to develop their social skills, empathy, and creativity.

Wooden Trains and Vehicles

Wooden trains and vehicles offer a fun and educational way to explore the world of transportation. Children can create their own tracks, build cities, and embark on imaginary adventures. These toys help develop hand-eye coordination, problem-solving skills, and spatial reasoning.

Wooden Musical Instruments

Introduce your child to the joy of music with wooden musical instruments. From xylophones and drums to ukuleles and guitars, these toys offer a fun and engaging way to explore sound and rhythm. Music is a powerful tool for developing cognitive skills, language skills, and emotional intelligence.

Choosing the Right Wooden Toys

When selecting wooden toys for your child, consider their age, interests, and developmental stage. Look for toys that are well-crafted, durable, and safe. Opt for natural finishes and avoid toys with excessive paint or varnish.

Remember, the best wooden toys are those that inspire imagination, creativity, and a love of learning. With their timeless appeal, enduring quality, and natural beauty, wooden toys are a gift that keeps on giving, fostering a lifetime of cherished memories and playful discovery.

Top 10 Free Woodworking Plans for Beginner Woodworkers

Posted by Alton with No comments
Top 10 Free Woodworking Plans for Beginner Woodworkers

Top 10 Free Woodworking Plans for Beginner Woodworkers

Embarking on the journey of woodworking can be an immensely rewarding experience. It allows you to create functional and beautiful pieces from scratch, fostering a sense of accomplishment and artistry. However, starting out can feel daunting, especially for beginners. Fear not, as numerous free woodworking plans are available online, catering to all skill levels. This article presents a curated selection of the top 10 free woodworking plans, perfect for novices eager to delve into the world of woodcraft.

1. Simple Cutting Board

A cutting board is an essential kitchen tool and a great starting point for beginners. It's a relatively straightforward project that introduces fundamental woodworking skills like measuring, cutting, and sanding. The simple design allows you to focus on mastering basic techniques without overwhelming complexities.

Materials:

  • Hardwood board (maple, walnut, or cherry)
  • Wood glue
  • Wood finish (mineral oil or butcher block oil)
  • Sandpaper (various grits)

Tools:

  • Table saw or circular saw
  • Hand saw or jigsaw
  • Sanding block
  • Clamps
  • Measuring tape
  • Pencil

2. Wooden Serving Tray

A wooden serving tray adds a touch of rustic elegance to any gathering. This project involves simple joinery techniques like miter cuts and gluing, providing a solid foundation for future woodworking endeavors. The tray can be personalized with various finishes and embellishments to reflect your style.

Materials:

  • Plywood or hardwood boards
  • Wood glue
  • Wood finish (stain, paint, or varnish)
  • Sandpaper (various grits)
  • Handles or decorative elements (optional)

Tools:

  • Miter saw or table saw
  • Hand saw or jigsaw
  • Sanding block
  • Clamps
  • Measuring tape
  • Pencil

3. Wall Shelf

Wall shelves are versatile storage solutions that can add character to any room. This project introduces the concept of attaching hardware to wood, providing valuable experience in assembling and mounting. You can experiment with different shapes, sizes, and finishes to create a unique piece tailored to your needs.

Materials:

  • Plywood or hardwood boards
  • Wood screws
  • Wall anchors (if necessary)
  • Wood finish (stain, paint, or varnish)
  • Sandpaper (various grits)

Tools:

  • Table saw or circular saw
  • Hand saw or jigsaw
  • Drill with drill bits
  • Sanding block
  • Clamps
  • Measuring tape
  • Pencil
  • Level

4. Wooden Birdhouse

A wooden birdhouse provides a charming addition to your garden and offers a haven for feathered friends. This project requires basic joinery skills, like dado cuts and rabbets, along with careful measurements to ensure the birdhouse is structurally sound. It's a fun and rewarding project that combines practical and aesthetic elements.

Materials:

  • Plywood or cedar boards
  • Wood glue
  • Wood screws
  • Paint or stain (optional)
  • Sandpaper (various grits)

Tools:

  • Table saw or circular saw
  • Hand saw or jigsaw
  • Drill with drill bits
  • Sanding block
  • Clamps
  • Measuring tape
  • Pencil

5. Simple Wooden Stool

A wooden stool is a versatile piece of furniture that can be used as extra seating or a decorative accent. This project introduces the concept of leg assembly and basic joinery techniques like mortise and tenon joints. It's a great stepping stone to more complex furniture projects.

Materials:

  • Hardwood boards (oak, walnut, or maple)
  • Wood glue
  • Wood screws (optional)
  • Wood finish (stain, paint, or varnish)
  • Sandpaper (various grits)

Tools:

  • Table saw or circular saw
  • Hand saw or jigsaw
  • Drill with drill bits
  • Chisels (for mortise and tenon joints)
  • Sanding block
  • Clamps
  • Measuring tape
  • Pencil

6. Wooden Jewelry Box

A wooden jewelry box is a thoughtful gift or a beautiful way to organize your trinkets. This project focuses on precision cutting and dovetail joinery, offering a challenge that develops your woodworking skills. You can add a touch of elegance with decorative elements like inlays or carving.

Materials:

  • Hardwood boards (cherry, walnut, or mahogany)
  • Wood glue
  • Wood finish (stain, paint, or varnish)
  • Sandpaper (various grits)
  • Hinges
  • Decorative elements (optional)

Tools:

  • Table saw or circular saw
  • Hand saw or jigsaw
  • Dovetail jig (optional)
  • Chisels (for dovetail joints)
  • Sanding block
  • Clamps
  • Measuring tape
  • Pencil

7. Wooden Coasters

Wooden coasters add a touch of sophistication to your coffee table or desk. These small projects are perfect for practicing basic woodworking skills like cutting, sanding, and finishing. You can experiment with different wood types and decorative elements to create a set that reflects your personality.

Materials:

  • Hardwood scraps or pre-cut blanks
  • Wood glue (optional)
  • Wood finish (stain, paint, or varnish)
  • Sandpaper (various grits)
  • Felt pads or cork

Tools:

  • Table saw or circular saw
  • Hand saw or jigsaw
  • Sanding block
  • Clamps (optional)
  • Measuring tape
  • Pencil

8. Wooden Picture Frame

A wooden picture frame is a timeless way to showcase cherished photographs or artwork. This project combines basic woodworking skills with design considerations, allowing you to customize the frame to complement the piece you're displaying. You can choose from various joinery methods and finishes to create a unique frame.

Materials:

  • Hardwood boards or molding
  • Wood glue
  • Wood screws
  • Wood finish (stain, paint, or varnish)
  • Sandpaper (various grits)
  • Glass or acrylic sheet (for the picture opening)
  • Picture frame hardware (clips or backing)

Tools:

  • Miter saw or table saw
  • Hand saw or jigsaw
  • Drill with drill bits
  • Sanding block
  • Clamps
  • Measuring tape
  • Pencil

9. Simple Wooden Plant Stand

A wooden plant stand adds a touch of greenery and elegance to your home. This project is a good opportunity to practice basic woodworking techniques like cutting, sanding, and assembling. You can experiment with different wood types and finishes to create a stand that complements your plants and décor.

Materials:

  • Hardwood boards (cherry, walnut, or maple)
  • Wood glue
  • Wood screws
  • Wood finish (stain, paint, or varnish)
  • Sandpaper (various grits)

Tools:

  • Table saw or circular saw
  • Hand saw or jigsaw
  • Drill with drill bits
  • Sanding block
  • Clamps
  • Measuring tape
  • Pencil

10. Wooden Mailbox

A wooden mailbox is a charming and practical addition to your home. This project requires basic woodworking skills like cutting, assembling, and attaching hardware. It also provides an opportunity to practice finishing techniques to protect the wood from the elements.

Materials:

  • Cedar or redwood boards
  • Wood glue
  • Wood screws
  • Wood finish (stain, paint, or weather-resistant sealant)
  • Sandpaper (various grits)
  • Mailbox hardware (latch, hinge, and mail slot)

Tools:

  • Table saw or circular saw
  • Hand saw or jigsaw
  • Drill with drill bits
  • Sanding block
  • Clamps
  • Measuring tape
  • Pencil

These top 10 free woodworking plans provide an excellent foundation for beginners to gain confidence and skill in the craft. As you progress, you can explore more complex projects, delve into different woodworking techniques, and discover the endless possibilities that wood offers. Remember, practice makes perfect, and the joy of creating something beautiful with your own hands is an invaluable reward.

Tuesday, November 19, 2024

Step-by-Step Guide to Making Wooden Lawn Chairs for Sale

Posted by Alton with No comments
Step-by-Step Guide to Making Wooden Lawn Chairs for Sale

A Step-by-Step Guide to Crafting Durable Wooden Lawn Chairs for Sale

Transforming raw lumber into sturdy, aesthetically pleasing lawn chairs is a rewarding experience that can lead to a profitable side hustle or even a full-fledged business. This comprehensive guide will walk you through the process of crafting wooden lawn chairs, from initial design to finishing touches, equipping you with the knowledge and skills to create high-quality pieces that customers will cherish.

Planning Your Design and Materials

Choosing the Right Wood

Selecting the appropriate wood is crucial for durability and longevity. Consider the following factors:

  • Hardwoods: Hardwoods like oak, maple, and cherry offer excellent strength, durability, and aesthetic appeal. They withstand weathering well and are suitable for high-use furniture.
  • Softwoods: Pines and cedar are readily available and work well for lawn chairs, offering a lighter weight and a more rustic look. They may require more frequent refinishing.
  • Treated Lumber: Pressure-treated lumber is resistant to rot and insect damage, making it ideal for outdoor applications. However, it may contain chemicals that could be harmful to the environment, so consider eco-friendly alternatives.

Design Considerations

Before you begin, carefully consider the design of your lawn chairs. Some factors to ponder include:

  • Style: Do you want classic adirondack chairs, modern minimalist designs, or something entirely unique?
  • Comfort: Aim for a design that offers comfortable seating, proper back support, and armrests.
  • Dimensions: Consider the average adult's height and weight when determining the chair's dimensions.
  • Assembly: Plan for a design that's easy to assemble and disassemble, especially if you're selling pre-assembled pieces.

Gathering Tools and Equipment

To build your chairs, you'll need a basic woodworking toolset. Invest in quality tools for optimal results:

  • Saw: A circular saw, table saw, or miter saw are essential for precise cuts.
  • Drill: A cordless drill with various bits is necessary for drilling pilot holes and attaching hardware.
  • Sanding tools: Sandpaper, an orbital sander, and a belt sander are crucial for achieving smooth surfaces.
  • Clamps: Various sizes of clamps will help secure your workpieces during assembly.
  • Measuring tools: A tape measure, ruler, and square are essential for accuracy.
  • Safety gear: Always wear safety glasses, ear protection, and gloves when using power tools.

Crafting the Chair Framework

Cutting the Lumber

Refer to your chosen design plans and carefully measure and cut the lumber for the chair's frame. Use a saw guide or jig for accurate and consistent cuts.

Assembling the Frame

Join the frame components using woodworking glue and screws. Use a drill to create pilot holes before driving screws to prevent wood splitting. Clamp the pieces together while the glue dries.

Adding Comfort and Style

Constructing the Seat and Back

Assemble the seat and back using similar techniques as the frame. You can create slatted seats and backs for better airflow and a classic look. You can also consider using plywood or solid wood for the seat and back, depending on your design preference.

Installing the Armrests

Attach the armrests to the frame, ensuring they are at a comfortable height and angle. You can choose to add decorative details to the armrests, such as curves or angled edges.

Finishing Touches

Sanding and Smoothing

Thoroughly sand all surfaces to remove any rough edges and splinters. Start with coarse-grit sandpaper and gradually progress to finer grits to achieve a smooth finish.

Applying Stain or Paint

Choose a stain or paint that complements your design and provides protection against the elements. Apply several thin coats for a durable finish.

Adding a Protective Topcoat

Finish with a clear topcoat, such as polyurethane or varnish, to protect the wood from UV rays, moisture, and scratches. Apply several thin coats, allowing each layer to dry completely before applying the next.

Quality Control and Packaging

Inspecting Your Chairs

Before offering your chairs for sale, carefully inspect them for any flaws or imperfections. Ensure all joints are secure, the finish is even, and the chair is comfortable and sturdy.

Packaging and Presentation

Package your chairs for shipping or delivery. If selling locally, consider creating a professional presentation for displaying your chairs at craft fairs or online marketplaces.

Marketing and Pricing Your Chairs

Identifying Your Target Market

Determine who your ideal customers are. This could be homeowners, businesses, or individuals looking for high-quality, handcrafted outdoor furniture.

Pricing Strategies

Research similar products to determine a competitive price. Consider the cost of materials, labor, and overhead expenses.

Creating a Brand

Developing a brand name, logo, and tagline can help you stand out in a crowded market. Create a professional website or online store to showcase your products.

Building Your Business

Customer Service

Provide excellent customer service, including timely responses to inquiries and resolving any issues promptly.

Seeking Feedback

Gather feedback from customers to improve your products and services. Be open to constructive criticism and use it to refine your designs and production processes.

Expanding Your Offerings

Once you've established yourself, consider expanding your product line to include other wooden furniture pieces or complementary outdoor items.

Crafting wooden lawn chairs for sale can be a rewarding and lucrative endeavor. With careful planning, attention to detail, and a commitment to quality, you can create beautiful, durable chairs that customers will love. As you gain experience, you can expand your business and build a successful woodworking venture.

Monday, November 18, 2024

How to Sell Handmade Wooden Serving Trays on Etsy

Posted by Alton with No comments
How to Sell Handmade Wooden Serving Trays on Etsy

Crafting Your Way to Success: How to Sell Handmade Wooden Serving Trays on Etsy

So, you've got the skills, the passion, and a workshop filled with beautiful wood. You're ready to share your handcrafted wooden serving trays with the world, and Etsy is the perfect platform to do it! But with millions of sellers vying for attention, how do you stand out and make those beautiful trays fly off the virtual shelves? Don't worry, you've got this! Let's dive into the world of Etsy and learn how to make your wooden serving trays a smashing success.

Setting Up Your Etsy Shop: The Foundation of Your Success

First things first, you need a shop! Think of your Etsy shop as your online storefront â€" it's your chance to showcase your talents and build a brand. Here's how to get started:

Choosing a Catchy Shop Name

This is your first impression, so make it count! Your shop name should be memorable, relevant to your products, and ideally easy to spell.

Crafting a Compelling Shop Banner

Think of your shop banner as your online storefront window. It's the first thing visitors see, so make it eye-catching and relevant to your brand. Feature a stunning photo of your wooden serving trays, maybe even a styled shot, to give potential buyers a taste of what they can expect.

Writing a Captivating Shop Announcement

This is your chance to introduce yourself and your brand. Share a bit about your passion for woodworking, the unique aspects of your serving trays, and maybe even a fun fact or two. Make it personal and inviting!

Showcasing Your Work: Crafting Irresistible Listings

Each product listing is your opportunity to tell a story, highlight the beauty of your work, and persuade buyers to click "Add to Cart."

High-Quality Photos Are Essential

Show off your serving trays in their best light! Use good lighting, a neutral background, and maybe even some props to create visually appealing photos. Show them from different angles, and don't forget close-ups to highlight the wood grain and intricate details. If you're feeling adventurous, create styled photographs with food or decor to inspire customers.

Write Detailed and Engaging Descriptions

Don't just list the specs; tell a story! Describe the wood you used, the craftsmanship that went into each piece, and the unique character of each tray. Highlight the benefits of owning a handmade wooden serving tray, like durability, sustainability, and the heirloom quality.

Use Relevant Keywords

Think like your customer! What terms would they use to search for a beautiful wooden serving tray? Use a mix of specific and general keywords in your titles, descriptions, and tags to make sure your listings show up in searches.

Embrace Variations and Options

Offer different sizes, wood types, finishes, and even custom options. This gives your customers more choices and shows your flexibility.

Pricing Your Trays: Finding the Sweet Spot

Pricing your handmade wooden serving trays is a balance between your time, materials, and the market value. Here are some things to consider:

Cost of Materials

Factor in the cost of wood, finishes, hardware, and any other supplies you use.

Time and Labor

Don't undervalue your time and skills! Account for the hours you spend designing, crafting, and finishing each tray.

Market Research

Check out other Etsy sellers of similar products to get a sense of the going rate. Look at the pricing of comparable wooden serving trays on other platforms like Amazon and craft fairs. Don't forget to consider the size, complexity, and materials used.

Profit Margin

Set a price that allows you to make a profit while remaining competitive. Don't be afraid to adjust your prices based on market demand and customer feedback.

Building Your Brand: Engaging Your Audience

Once you've got your shop and listings set up, it's time to connect with your audience. Here's how to create a strong brand and foster customer relationships:

Social Media Engagement

Show off your woodworking journey! Post photos of your work in progress, behind-the-scenes glimpses of your workshop, and finished products in beautiful settings. Share your inspirations, answer questions, and engage with potential customers.

Offer Excellent Customer Service

Respond to messages promptly, address concerns with empathy, and go the extra mile to make sure your customers are happy. This builds trust and encourages repeat business.

Run Promotions and Discounts

Offer limited-time sales or discounts to attract new customers and keep existing ones coming back for more.

Etsy SEO: Getting Found in the Search Results

Think of Etsy SEO as making your shop and listings discoverable. Here are some key strategies to boost your visibility:

Use Relevant Keywords

This is crucial for Etsy's search algorithm. Use keywords throughout your listings (titles, descriptions, tags), focusing on terms that your potential customers would search for.

Optimize Your Shop Banner and Title

Include keywords in your shop banner and title so they show up in Etsy search results.

Utilize Etsy's "Attributes"

Fill out all applicable attributes for your listings, such as size, material, color, and style. This helps your listings show up in relevant searches and filters.

Stay Active and Consistent

Regularly update your shop, add new listings, and engage with customers. Etsy's algorithm favors sellers who are active and engaged.

Commonly Asked Questions

Here are some common questions that Etsy sellers often ask:

  • How much does it cost to open an Etsy shop? Etsy has a monthly subscription fee, but there are no listing fees. You only pay a commission when a sale is made.
  • How do I ship my products? Etsy offers integrated shipping labels and you can choose from various shipping options.
  • How do I handle returns and refunds? Etsy provides guidelines for returns and refunds, and you can create a custom return policy for your shop.
  • How do I promote my shop on social media? Create compelling posts with high-quality photos of your serving trays, use relevant hashtags, and engage with your followers.
  • How do I get reviews and feedback? Encourage customers to leave reviews by including a note in your packaging or sending a follow-up message.

Selling your handcrafted wooden serving trays on Etsy is a rewarding journey. It takes time, dedication, and a bit of creative flair, but with the right strategy and a passion for your work, you can build a thriving business and share your artistry with the world!

Wednesday, November 13, 2024

Stylish Wooden Key Holders with Hooks and Shelving for Extra Function

Posted by Alton with No comments
Stylish Wooden Key Holders with Hooks and Shelving for Extra Function

Elevate Your Entryway: Stylish Wooden Key Holders with Hooks and Shelving

Forget about the days of fumbling around for your keys. A stylish wooden key holder with added functionality is the perfect solution for keeping your entryway organized and adding a touch of rustic charm. These key holders go beyond just holding your keys; they transform your entryway into a functional and visually appealing space.

Beyond Basic Key Holders

The days of basic key hooks are gone. Modern wooden key holders offer a range of features that enhance both functionality and aesthetics. Hooks provide dedicated spots for keys, while shelves offer extra space for organizing mail, sunglasses, or even small plants. This blend of practicality and style makes these key holders an essential addition to any home.

Advantages of Wooden Key Holders

Wooden key holders boast several benefits that make them stand out from their metal or plastic counterparts:

Durability and Longevity

High-quality wood is inherently strong and long-lasting. A wooden key holder will withstand the test of time and frequent use, making it a worthwhile investment.

Natural Beauty

The warm, natural tones of wood bring a sense of organic beauty to your entryway. The unique grain patterns of each piece of wood ensure that your key holder is one-of-a-kind.

Versatility

Wooden key holders come in various styles to complement any home décor. From rustic to modern, you can find a key holder that seamlessly blends into your existing aesthetic.

Choosing the Right Wooden Key Holder

When selecting a wooden key holder, consider these factors:

  • Size: Choose a size that fits your entryway space and your storage needs.
  • Style: Select a design that complements your home's aesthetic. Consider the wood species and the finishing touches, such as metal accents or hardware.
  • Functionality: Assess how many hooks and shelves you need to ensure adequate storage for your items.

Styling Tips

Here are some tips for incorporating a wooden key holder into your entryway:

  • Add a touch of greenery: Place a small potted plant or a sprig of greenery on the shelf to infuse the space with life and color.
  • Utilize baskets: Add a decorative basket to the shelf for storing smaller items like gloves or scarves.
  • Enhance lighting: Position a stylish lamp or pendant light near the key holder to highlight its beauty and illuminate the entryway.

With a stylish wooden key holder, you can transform your entryway into a welcoming and functional space that reflects your personal style. Embrace the natural beauty and practicality of wood, and create an entryway that truly makes a statement.

DIY Wooden Christmas Candle Holders

Posted by Alton with No comments
DIY Wooden Christmas Candle Holders

DIY Wooden Christmas Candle Holders: A Festive and Charming Project

Looking for a charming and personalized way to adorn your home for the holidays? Look no further than crafting your own wooden Christmas candle holders. This project is perfect for all skill levels, allowing you to create unique and heartwarming decorations that will fill your space with warmth and holiday cheer.

Gather Your Supplies

Before embarking on your crafting adventure, ensure you have all the necessary materials. Start by selecting your wood. Pine and cedar are excellent choices for their natural fragrance and ease of carving. You'll also need:

  • Candles
  • Wood glue
  • Sandpaper
  • Paint or stain (optional)
  • Paintbrushes (if using paint)
  • Protective sealant (optional)
  • Measuring tape
  • Pencil
  • Saw (if needed to cut wood)
  • Drill (if needed for candle placement)

Choose Your Design

The beauty of DIY projects lies in their flexibility. Let your imagination run wild! Here are some inspiring ideas to get you started:

  • Simple Square or Rectangle Holders: Cut wood to the desired dimensions and smooth the edges with sandpaper. Add festive touches with paint, stain, or decorative embellishments.
  • Tree-shaped Candle Holders: Create a rustic charm with a tree silhouette cut from wood. You can paint it green or leave it natural for a more traditional feel.
  • Star or Snowflake Designs: For a more intricate design, use a stencil or draw your own star or snowflake shape onto the wood. Cut it out carefully and add details with paint or stain.
  • Personalized Holders: Create unique holders by adding names, dates, or special messages to the wood. Use stencils, paint, or wood-burning tools for this.

Crafting Your Candle Holders

Now, it's time to put your crafting skills to the test! Follow these steps to create your charming wooden candle holders:

  1. Prepare the Wood: Cut and sand your wood to achieve the desired size and shape. Ensure the edges are smooth and free of splinters.
  2. Create Candle Placement: If using pillar candles, carefully drill holes that are slightly smaller than the candle diameter. For tealights, use a hot glue gun to create a platform for the tea lights on the bottom of your holder.
  3. Decorate: Let your creativity flow! Add paint, stain, or embellishments like glitter, sequins, or dried flowers to enhance your holders.
  4. Seal (Optional): Apply a protective sealant to your holders for durability and to preserve the finish.

Finishing Touches

Once your candle holders are complete, arrange them on your mantle, table, or any other festive surface. Add some greenery, pinecones, or ornaments to create a complete holiday ambiance.

And there you have it! You've just created unique, personalized wooden Christmas candle holders that will add a touch of warmth and charm to your home during the holiday season. Enjoy the process of creating and the beauty of your handiwork. Happy Holidays!

No-Fuss Woodworking Ideas for Newbies

Posted by Alton with No comments
No-Fuss Woodworking Ideas for Newbies

No-Fuss Woodworking Ideas for Newbies

Embarking on a woodworking journey can be both exhilarating and daunting, especially for beginners. The vast world of woodworking, with its intricate techniques and specialized tools, might seem overwhelming at first. But fear not! This guide will equip you with beginner-friendly woodworking ideas that are simple, achievable, and rewarding. With a little patience and these easy-to-follow steps, you'll be crafting beautiful and functional pieces in no time.

1. Simple Shelves

Shelves are a practical and versatile addition to any space, and they're surprisingly easy to build. You can create floating shelves for displaying your prized possessions, sturdy bookcases for organizing your library, or even small spice racks for your kitchen.

Materials You'll Need:

  • Wood boards (pine, plywood, or MDF are good options)
  • Wood glue
  • Screws or nails
  • Measuring tape
  • Pencil
  • Saw (hand saw, circular saw, or jigsaw)
  • Drill
  • Level
  • Sandpaper (various grits)
  • Wood stain or paint (optional)

Steps:

  1. Measure and Cut: Determine the dimensions of your shelves and mark them on the wood boards using a pencil. Cut the boards to size using your chosen saw. Ensure the cuts are straight and clean.
  2. Assemble the Shelves: If you're building a multi-shelf unit, join the boards together using wood glue and screws or nails. Clamp the pieces together while the glue dries. For floating shelves, you can use shelf brackets or concealed supports.
  3. Sand and Finish: Once the glue is dry, sand the edges and surfaces of your shelves with sandpaper. Start with a coarse grit and progressively move to finer grits for a smooth finish. You can stain or paint the shelves to your liking.
  4. Install the Shelves: Attach the shelves to the wall using screws or anchors, ensuring they are level. Enjoy your new and functional shelves!

2. Wooden Coasters

Wooden coasters are a charming and personalized touch for your home. These small projects are excellent for beginners, as they require minimal tools and materials.

Materials You'll Need:

  • Small pieces of scrap wood (about 4 inches square)
  • Sandpaper (various grits)
  • Wood glue
  • Felt pads (optional)
  • Wood stain or paint (optional)

Steps:

  1. Cut the Wood: Cut your scrap wood into squares or circles using a saw. You can also use pre-cut pieces of wood, such as tile squares or small wooden blocks.
  2. Sand the Edges: Sand the edges and surfaces of your coasters with sandpaper to create a smooth finish. Start with a coarse grit and progressively move to finer grits.
  3. Apply Finish (Optional): If desired, stain or paint the coasters to your liking. Allow the finish to dry completely.
  4. Attach Felt Pads (Optional): To protect your surfaces, glue felt pads to the bottom of the coasters.
  5. Enjoy: Your coasters are now ready to protect your furniture from condensation and spills.

3. Picture Frames

Picture frames are a simple yet stylish way to showcase your favorite photos and artwork. You can create frames in various shapes and sizes to complement your personal aesthetic.

Materials You'll Need:

  • Wood molding (various profiles available)
  • Miter saw or hand saw
  • Wood glue
  • Finishing nails or brads
  • Measuring tape
  • Pencil
  • Sandpaper
  • Wood stain or paint (optional)
  • Glass or acrylic sheet (optional)
  • Picture frame backing (optional)

Steps:

  1. Measure and Cut: Measure the dimensions of your picture and add a margin for the frame. Mark the cuts on the wood molding using a pencil. Cut the molding to size using a miter saw or hand saw, ensuring precise 45-degree angles for the corners.
  2. Join the Pieces: Apply wood glue to the ends of the molding pieces and join them together, creating a frame shape. Clamp the frame while the glue dries.
  3. Secure the Frame: Once the glue is dry, secure the joints with finishing nails or brads. Countersink the nails or brads for a clean look.
  4. Sand and Finish: Sand the frame to smooth out any rough edges and imperfections. Apply wood stain or paint to your liking, allowing it to dry completely.
  5. Add Extras (Optional): For a more professional finish, you can add a glass or acrylic sheet to the front of the frame and a backing with a hanger to display your picture.
  6. Display Your Artwork: Your picture frame is now complete and ready to showcase your favorite artwork or photo.

4. Cutting Boards

Cutting boards are essential kitchen tools, and making your own adds a personal touch. You can customize the size and shape of your cutting board to suit your needs and preferences.

Materials You'll Need:

  • Hardwood boards (maple, walnut, or cherry are good choices)
  • Wood glue
  • Clamps
  • Measuring tape
  • Pencil
  • Saw (hand saw, circular saw, or jigsaw)
  • Plane (optional)
  • Sandpaper (various grits)
  • Mineral oil or butcher block oil (optional)

Steps:

  1. Prepare the Wood: If necessary, plane the wood boards to ensure they are flat and smooth. Sand the surfaces with sandpaper to create a consistent texture.
  2. Join the Boards: Apply wood glue to the edges of the boards and join them together, creating a cutting board. Clamp the boards firmly while the glue dries. For a thicker cutting board, you can use multiple boards.
  3. Shape the Cutting Board: Once the glue is dry, use a saw to shape the edges of the cutting board to your liking. You can create a rectangular, square, or even a rounded shape.
  4. Sand the Cutting Board: Sand the surfaces and edges of the cutting board with sandpaper. Start with a coarse grit and progressively move to finer grits for a smooth finish.
  5. Apply Finish (Optional): For a protective finish, apply mineral oil or butcher block oil to the cutting board. Allow the oil to absorb completely.
  6. Enjoy Your New Cutting Board: Your personalized cutting board is now ready to serve you in the kitchen.

These are just a few beginner-friendly woodworking ideas to get you started. As you gain experience, you can explore more complex projects like furniture building, box making, or even carving. The world of woodworking is full of possibilities, and the key is to start with simple projects and build your skills gradually. Remember to prioritize safety, use the right tools and materials, and have fun with the process!

DIY Jewelry Box: A Simple Woodworking Gift Idea

Posted by Alton with No comments
DIY Jewelry Box: A Simple Woodworking Gift Idea

DIY Jewelry Box: A Simple Woodworking Gift Idea

Looking for a thoughtful and unique gift that you can create with your own hands? Look no further than a DIY jewelry box. This simple woodworking project is perfect for beginners, and it's a great way to show someone you care. Plus, it's a practical gift that they can use every day.

Materials You'll Need

Before you start, gather the following materials:

  • Wood (1/2 inch thick) â€" Choose your favorite wood type for the box. Pine, cedar, or plywood are good beginner options.
  • Wood glue
  • Screws (1 1/4 inches)
  • Sandpaper (fine grit and medium grit)
  • Wood stain or paint (optional)
  • Clear polyurethane finish (optional)
  • Hinges (2)
  • Jewelry box hardware (optional) â€" Consider adding a lock and key, drawer pulls, or decorative trim.

Cut and Assemble the Pieces

Start by cutting the wood to the desired dimensions of your box. You'll need four pieces for the sides, two pieces for the top and bottom, and a smaller piece for the lid. Use a saw to cut the pieces accurately and make sure they are all the same size.

Next, glue the sides together to form the box. Make sure the corners are square and let the glue dry completely. Secure the sides with screws to reinforce the structure. Repeat this process for the lid, securing the top and bottom pieces together.

Sand and Finish the Box

Once the box is dry, use sandpaper to smooth out any rough edges and imperfections. Start with medium grit sandpaper and then switch to fine grit for a polished finish. Be sure to sand all surfaces thoroughly. If you're planning to stain or paint the box, sand the entire surface using fine grit sandpaper to create a smooth finish for the stain or paint to adhere to.

After sanding, apply a coat of wood stain or paint, if desired. Allow the stain or paint to dry completely before applying a clear polyurethane finish for protection and a glossy shine.

Attach the Hinges and Lid

Attach the hinges to the lid and the box body, ensuring they are aligned properly. Use wood glue to secure the hinges to the wood and then use screws to reinforce the hinges.

Now, carefully attach the lid to the box, ensuring it opens and closes smoothly. If you're adding any additional hardware, like a lock or drawer pulls, install them now.

Personalize Your Jewelry Box

You can personalize your jewelry box in many ways. You can add a custom design to the lid using wood burning, paint, or other decorative techniques. You can also personalize the box by adding a special inscription or your recipient's initials.

Enjoy Your Handmade Gift

Your DIY jewelry box is now complete! Present it to your loved one with pride, knowing you've crafted a thoughtful and unique gift that they'll cherish for years to come.

Make Your Own Wood Floating Shelves with Reclaimed Wood

Posted by Alton with No comments
Make Your Own Wood Floating Shelves with Reclaimed Wood

Create Unique Floating Shelves with Reclaimed Wood

Floating shelves, with their sleek, minimalist design, are a popular choice for adding storage and style to any room. But what if you could take this popular design element and infuse it with a unique touch of history and character? By crafting your own floating shelves with reclaimed wood, you can achieve a truly one-of-a-kind look, while also giving salvaged materials a new life.

Reclaimed wood is not only environmentally friendly but also carries the charm of its past, adding a unique aesthetic to your shelves. It comes in a variety of textures and colors, offering endless possibilities for your DIY project. With a little effort and the right tools, you can create stunning floating shelves that will be the envy of your friends and family.

Gathering the Materials

Before you begin your project, gather all the necessary materials. You'll need:

  • Reclaimed wood boards (consider thickness, length, and desired number of shelves)
  • Wood screws (appropriate size for your boards)
  • Heavy-duty wall anchors (if necessary for your wall type)
  • Wood glue
  • Level
  • Measuring tape
  • Pencil
  • Safety glasses
  • Drill
  • Saw (for cutting wood boards)
  • Sandpaper (various grits)
  • Optional: Wood stain or paint

Preparing the Wood

Start by selecting your reclaimed wood boards. Consider the size, shape, and overall aesthetic you are looking for in your shelves. If the boards are rough or have loose knots, use sandpaper to smooth them out. Ensure the boards are clean and free of debris before moving on.

If you are using multiple boards to create a wider shelf, you can attach them using wood glue and screws for extra strength. Be sure to clamp the boards together until the glue dries for a strong bond.

Now it's time to cut your boards to the desired length. Use a saw, ensuring it is sharp and stable, to make precise cuts. Be sure to wear safety glasses to protect your eyes during this process.

Installing the Shelf Brackets

The beauty of floating shelves lies in their seemingly effortless, suspended appearance. However, to achieve this, you'll need to strategically install shelf brackets. These brackets are the hidden heroes, securely holding your shelves in place.

Before installing, measure the desired height of your shelves and mark the wall with a pencil. Determine the position of your shelf brackets, keeping in mind the weight of your shelves and the wall type. For heavier shelves or weak walls, you might need to use wall anchors for added support.

Use your drill to create pilot holes for your shelf brackets before attaching them to the wall. You may need to use a level to ensure that your brackets are installed evenly and securely.

Finishing Touches

Once the brackets are securely in place, you can now attach your reclaimed wood shelves. Be sure to pre-drill holes for the screws to prevent the wood from splitting.

Before finally installing the shelves, consider whether you want to add a personal touch. Sand the shelves further, highlighting their natural grains. If you are going for a specific look, consider staining or painting the shelves to match your decor.

With the shelves in place, stand back and admire your work. You have created a unique piece of furniture that adds character to your home, while giving reclaimed wood a new life.

Basic Woodworking Projects to Develop Skills

Posted by Alton with No comments
Basic Woodworking Projects to Develop Skills

Ready to Get Your Hands Dirty? Basic Woodworking Projects to Build Your Skills

Hey there, fellow woodworkers! Whether you're a complete newbie or have dabbled a bit, it's always exciting to start a new woodworking project. But where do you begin? Picking the right project is key! You want something that will challenge you, teach you new skills, and leave you with something you'll actually use or be proud to show off.

That's why we've put together this guide to basic woodworking projects perfect for beginners. We'll walk you through everything from choosing the right tools and materials to picking the perfect project to kickstart your woodworking journey. Let's get started!

Getting Started: Gathering Your Tools and Supplies

Before you dive into any project, you'll need a few essential tools and supplies. Don't worry, you don't need a full-blown workshop to get started. Here's a basic list to help you get going:

  • Measuring Tools: A tape measure, ruler, and a combination square are must-haves for getting your cuts precise.
  • Cutting Tools: A handsaw is a good starting point for basic cuts. You can also consider a jigsaw for curves and a circular saw for straight cuts.
  • Clamps: These are essential for holding your pieces together while you work.
  • Sandpaper: Sanding is a crucial part of finishing your projects. Start with coarse grit for rough shaping and gradually move to finer grits for a smooth finish.
  • Safety Gear: Don't forget safety glasses, ear protection, and work gloves!

Beyond these essentials, you might also find a hammer, screwdriver, and a drill helpful. As you progress, you can always add more tools to your arsenal.

Basic Woodworking Projects for Beginners

Now for the fun part â€" picking your first project! We've selected a few beginner-friendly options that cover different skills and allow you to showcase your creativity.

1. Simple Cutting Board

A cutting board is a practical and useful project that's perfect for beginners. You'll learn basic cutting and sanding techniques, plus you'll get to choose your favorite wood type.

  • Skill Level: Beginner
  • Materials: Hardwood like maple, walnut, or cherry, food-safe oil or finish
  • Tools: Hand saw or circular saw, sandpaper, clamps, measuring tools

Tips:

  • Choose a wood that's sturdy and resists scratches and cuts.
  • Make sure your edges are smooth and free of splinters.
  • Use a food-safe oil or finish to protect your cutting board.

2. Wooden Shelf

Looking to organize your space? A simple wooden shelf is a great project to build your confidence and add functionality to your home.

  • Skill Level: Beginner
  • Materials: Pine, plywood, or other affordable wood, screws, wood glue, shelf brackets
  • Tools: Handsaw or circular saw, drill, measuring tools, tape measure

Tips:

  • Choose a strong wood that can support the weight of the items you'll be placing on the shelf.
  • Use wood glue and screws to secure the shelf to the brackets for added stability.
  • Pre-drill holes for your screws to prevent splitting the wood.

3. Birdhouse

This classic project is both charming and a great way to practice basic woodworking techniques.

  • Skill Level: Beginner
  • Materials: Cedar, pine, or plywood, screws, wood glue, paint or stain (optional)
  • Tools: Handsaw or jigsaw, drill, measuring tools, tape measure

Tips:

  • Use a weather-resistant wood like cedar or pine for your birdhouse.
  • Make sure the entrance hole is the right size for the type of birds you want to attract.
  • Add a perch for the birds to land on.

4. Picture Frame

Framing your favorite photos or artwork is a simple project that lets you get creative with wood finishes and designs.

  • Skill Level: Beginner
  • Materials: Molding, miter saw or chop saw, wood glue, picture frame backing
  • Tools: Miter saw or chop saw, measuring tools, tape measure

Tips:

  • Use a miter saw for accurate 45-degree cuts, ensuring a clean, professional-looking frame.
  • Choose a molding style that complements the picture or artwork.
  • Use wood glue and clamps to secure the corners of the frame.

Important Tips for Success

Here are a few extra tips to help you tackle your woodworking projects with confidence:

  • Start Small: Don't go for the biggest, most complicated project right away. Start with simple projects to gain experience and build your skills.
  • Measure Twice, Cut Once: Accuracy is key in woodworking. Take your time measuring and double-check your measurements before making cuts.
  • Practice Safety: Always wear safety glasses and ear protection when working with woodworking tools.
  • Don't Be Afraid to Ask for Help: There are plenty of resources available online and in your community to help you with your woodworking projects.

And remember, woodworking is a journey, not a race. Enjoy the process, learn from your mistakes, and celebrate your successes!

Tuesday, November 12, 2024

Stylish Coffee Table DIY Build with Free PDF Plans

Posted by Alton with No comments
Stylish Coffee Table DIY Build with Free PDF Plans

Craft a Chic Coffee Table: Your DIY Guide with Free PDF Plans

Elevate your living room with a custom-made coffee table that reflects your style and budget. Building your own coffee table is a rewarding project that allows you to express your creativity and personalize your space. With our free PDF plans and detailed instructions, you can craft a stylish coffee table that complements your home décor and becomes a cherished centerpiece.

Choosing the Right Design

The first step in your coffee table journey is selecting the design that best suits your aesthetic and needs. Consider your existing furniture, the overall style of your living room, and the desired size and shape of the table. Explore a variety of designs, from sleek modern to rustic farmhouse, and choose one that resonates with you. Browse online resources, design magazines, and even visit local furniture stores for inspiration.

Gathering Your Materials

Once you have chosen a design, gather the necessary materials. The materials will vary depending on the design you choose, but common components include:

  • Wood (e.g., pine, oak, walnut)
  • Plywood (for table top and shelves)
  • Hardware (e.g., screws, nails, wood glue)
  • Finish (e.g., paint, stain, sealant)
  • Tools (e.g., saw, drill, sander)

Ensure you have enough of each material to complete the project. Don't hesitate to visit your local lumber yard or hardware store for advice on choosing the right materials and quantities.

Utilizing Free PDF Plans

Our free PDF plans will guide you step by step through the construction process. The plans include detailed diagrams, measurements, and instructions, making it easy for you to follow along. Download the plans and study them thoroughly before beginning the project.

Essential Tips for Success

  • Measure twice, cut once: Accuracy is crucial, so double-check your measurements before making cuts.
  • Sanding is key: Smooth out rough edges and surfaces for a polished finish.
  • Choose the right finish: Select a finish that complements the wood and your style.
  • Take your time: Building a coffee table takes time and effort, so work at a comfortable pace and enjoy the process.

Final Touches

Once you have assembled the coffee table, add the finishing touches. Apply the chosen paint, stain, or sealant to enhance the wood and protect it from scratches and spills. If desired, you can add decorative elements like drawer pulls, knobs, or embellishments to personalize your creation.

Enjoy Your Handmade Masterpiece

Congratulations! You have now created a stylish and functional coffee table that you can be proud of. Position it in your living room and enjoy the satisfaction of having built something beautiful with your own hands. Your new coffee table will serve as a conversation starter and a testament to your craftsmanship for years to come.

How to Build a Firewood Rack from Pallets: A Step-by-Step Guide

Posted by Alton with No comments
How to Build a Firewood Rack from Pallets: A Step-by-Step Guide

How to Build a Firewood Rack from Pallets: A Step-by-Step Guide

Transforming discarded pallets into a stylish and functional firewood rack is a great way to give those wooden structures a second life. This project is a perfect blend of practicality and affordability, allowing you to store your firewood neatly while adding a rustic charm to your outdoor space. Let's embark on this DIY adventure, step by step.

Gather Your Supplies

Before you get your hands dirty, ensure you have all the necessary materials. This project is all about repurposing and making the most of what you have. Here's what you'll need:

Materials

  • Two sturdy pallets (Choose pallets with solid, unrotted wood)
  • Wood screws (2.5" or 3" in length)
  • Wood glue
  • Safety goggles
  • Work gloves
  • Power drill with drill bits
  • Measuring tape
  • Saw (circular saw or handsaw)
  • Sandpaper (medium and fine grits)
  • Optional: Stain or paint for a personalized touch

Prepare the Pallets

Start by inspecting your pallets for any loose boards, nails, or debris. Remove these hazards for safety. Use your saw to cut any protruding boards or slats that might interfere with the rack's structure. This step ensures a clean and safe working surface.

Assemble the Firewood Rack

This is where the magic happens! Here's how to assemble your firewood rack:

Laying the Foundation

Place one pallet flat on the ground. This will serve as the base of your rack. Align the second pallet vertically against the base, ensuring the slats of the vertical pallet interlock with the slats of the base pallet. This creates a sturdy, interlocked structure.

Securing the Structure

Use wood screws to firmly attach the vertical pallet to the base pallet. Drive the screws through the slats where they intersect. Use wood glue to reinforce the joints for extra strength and stability.

Enhancing the Rack (Optional)

If you want a more polished look, sand down the edges of the pallets and any rough spots. Apply a stain or paint to enhance the natural beauty of the wood or give your rack a personalized touch. Let the finish dry completely before using the rack.

Positioning Your Firewood Rack

Choose a suitable location for your firewood rack. A covered area or a sheltered spot will help protect your wood from rain and moisture. Place your rack in a convenient spot for easy access and enjoyment.

Enjoy Your New Firewood Rack

Congratulations! You've successfully built a stylish and functional firewood rack from recycled pallets. This project is a testament to the power of repurposing and creativity. Now, you're ready to stack your firewood with pride, adding a rustic charm to your outdoor space.